


Adobe makes life easier for Lightroom users by building in keyboard shortcuts. You probably know some of the more important ones by heart (e.g.: T to reveal or hide the Toolbar, \ to toggle between before and after views, and O to reveal the Adjustment Brush overlay). But I’m also betting there are quite a few shortcuts you didn’t even know existed. Here are some of the more useful, lesser known ones.
1. Reveal all Shortcuts
Keyboard shortcuts are difficult to remember, especially if you don’t use them that often. But if you press Ctrl + / (PC) or Cmd + / (Mac), Lightroom displays a list of the shortcuts available in the current module. When you’re done, click anywhere on the shortcut list to hide it.
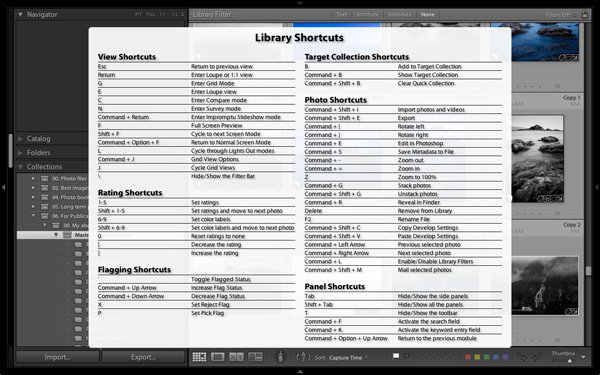
Library module shortcuts.
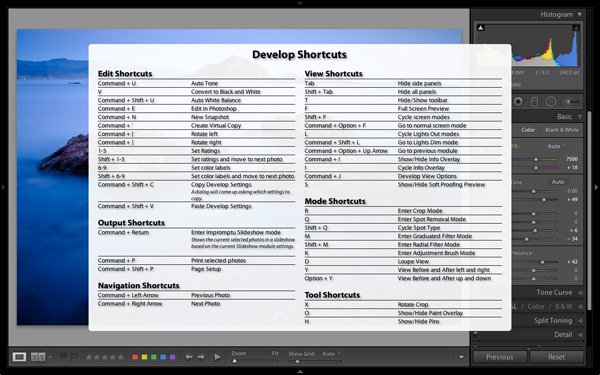
Develop module shortcuts.
Note: The rest of these keyboard shortcuts are for the Develop module. Not all of them are shown on the shortcuts list.
2. Rotate the Crop Overlay
If you’ve ever tried to make a portrait crop from a landscape image you’ll have experienced the frustration of trying to rotate the Crop Overlay (press R to go straight to that tool).
Lightroom automatically gives the Crop Overlay the same orientation as the photo, with no immediately obvious way of rotating it. To do so, simply press X.
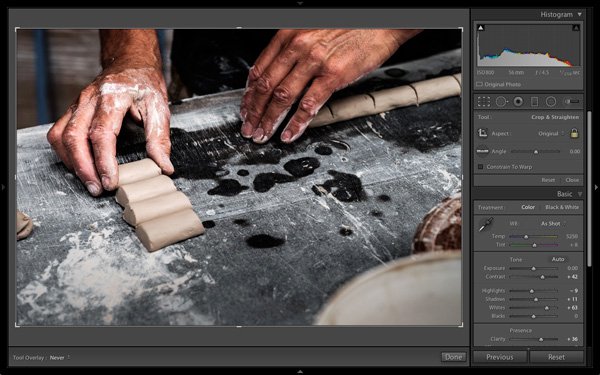
By default the Crop Overlay is automatically given the same size and orientation as the original frame.
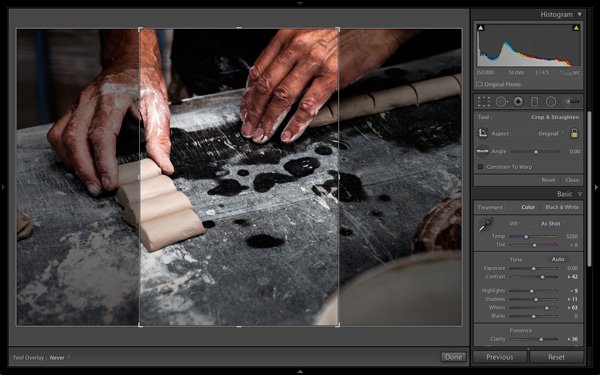
Press X to rotate the Crop Overlay and make an extreme crop.
3. Resample Spot Removal Tool
The good thing about the Spot Removal Tool (which you can activate by pressing Q) is that Lightroom is quite good at guessing which part of the image it should sample, in order to heal the selected area. But it doesn’t get it right all the time. If you don’t like the result, press the / key and Lightroom will choose a different area to sample. Repeat as often as you like.

In this example I wanted to get rid of this dark blob in the background because it’s a distraction.
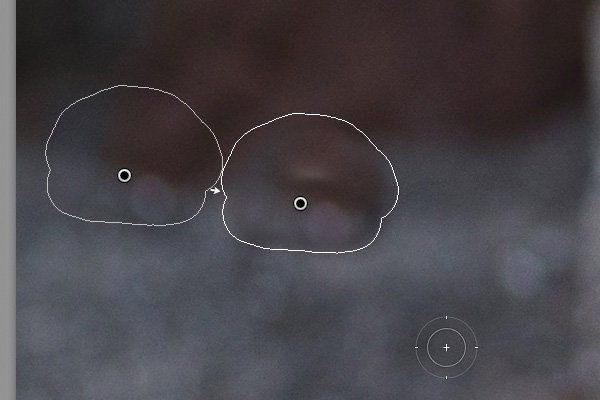
Lightroom’s first guess doesn’t really work.
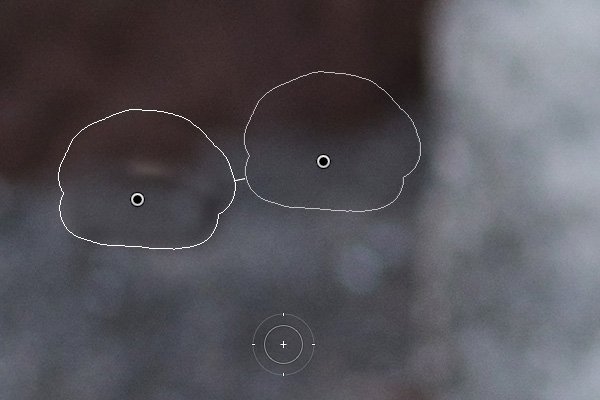
But the second one is much better. You can of course fine-tune it by moving the pin indicating the sampled area manually.
4. Automatic White and Black points
If you double-click on the Whites and Blacks sliders in the Basic panel, Lightroom resets them to zero. If you hold the Shift key down while you do it, Lightroom calculates the best settings, working out where to position both sliders so that the histogram stretches all the way from the left side of the graph (shadows) to the right (highlights) without any gaps. This quick fix makes most photos look better right away. The flatter the original photo, the more extreme the settings required.
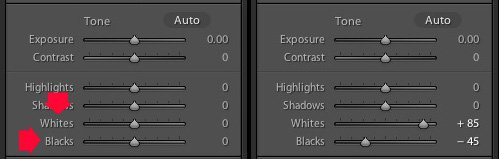
Double-click the Whites and Blacks sliders while holding the Shift key down. Make sure you double-click the words and not the slider itself.
5. Flip a Graduated Filter
Press the apostrophe key to flip (invert) a Graduated Filter. One practical use for this is as follows:
- Create a Graduated Filter over the sky of a landscape image (hold the Shift key down while you do so to keep the Graduated Filter straight) and move the Exposure slider left to darken that area.
- Right-click on the Graduated Filter’s pin and select Duplicate. This creates a new Graduated Filter with exactly the same settings as the first.
- Press the apostrophe key to flip the Graduated Filter. Now the minus Exposure setting is applied to the foreground. We don’t want to make the foreground darker, so double-click the Exposure slider to return it to zero. Now we are ready to use this new Graduated Filter to enhance the foreground.
- Move the Clarity slider right to emphasise the texture in the foreground. You may also need to move the Exposure slider left if this brightens the foreground too much.
The net result is that you have applied two Graduated Filters, one to the sky, and the other to the foreground.
***By the way, the apostrophe shortcut also works with the Radial Filter.

(A) Original photo. (B) Graduated Filter with minus Exposure applied to sky. (C) Duplicated and flipped Graduated Filter applied to foreground, with plus Clarity and minus Exposure. (D) Final result.
Your turn
What keyboard shortcuts do you use in Lightroom and why? Please let us know in the comments.
The Mastering Lightroom Collection
 My Mastering Lightroom ebooks will help you get the most out of Lightroom 4 and Lightroom 5. They cover every aspect of the software from the Library module through to creating beautiful images in the Develop module. Click the link to learn more or buy.
 Started out doing photography at the age of 6 using an uncle's old 1940 kodak brownie box camera. At 15 years of age, I decided to buy my very own 1975 Praktica SLR camera. I now shoot with a Nikon D850. I do unpaid TFP and commercial paid work.