


Peak Design Capture Clip V3 Review
Every once in a great while, a company ‘invents the wheel’ with a product. What do I mean by that? I mean that the invented product is so functionally appropriate that it becomes a new standard. The Peak Design Capture Clip V3 is just like a wheel. It’s an uncomplicated, useful, and seemingly obvious solution to keep a photographer’s camera mounted on or close to their body.
I think the most important yet overlooked gear in photography is the stuff that facilitates our jobs – not just the camera or lens themselves. That’s why this product works so well. It makes your camera immediately available to you yet simultaneously out of the way. No matter what camera or lens you have, being able to navigate your environment unencumbered and being ready to get the shot is worth a heck of a lot.
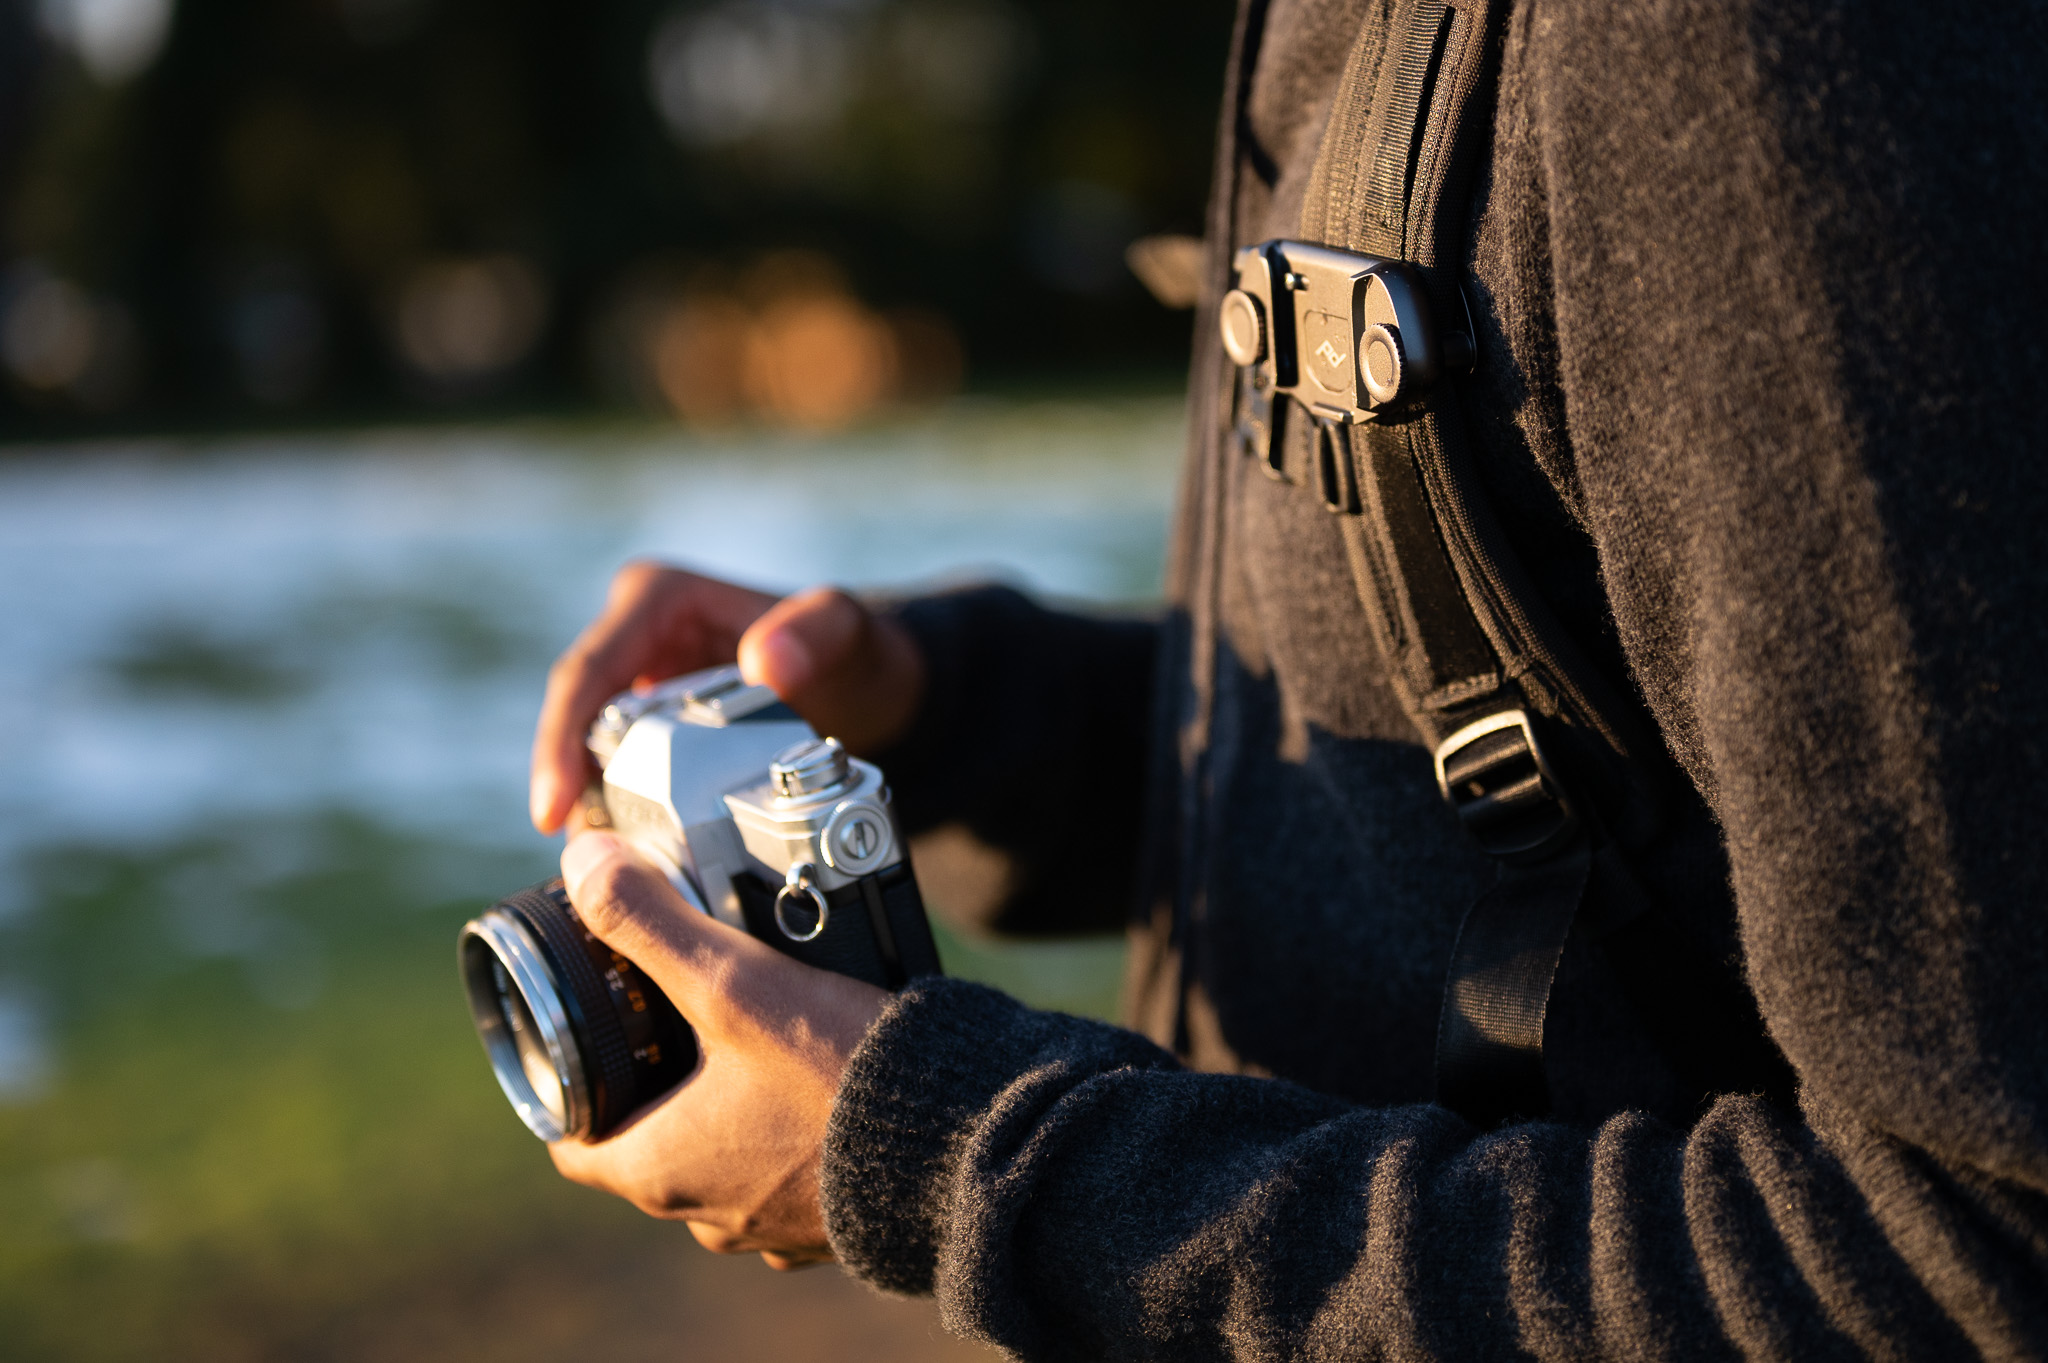
Table of Contents
What is a Capture Clip?
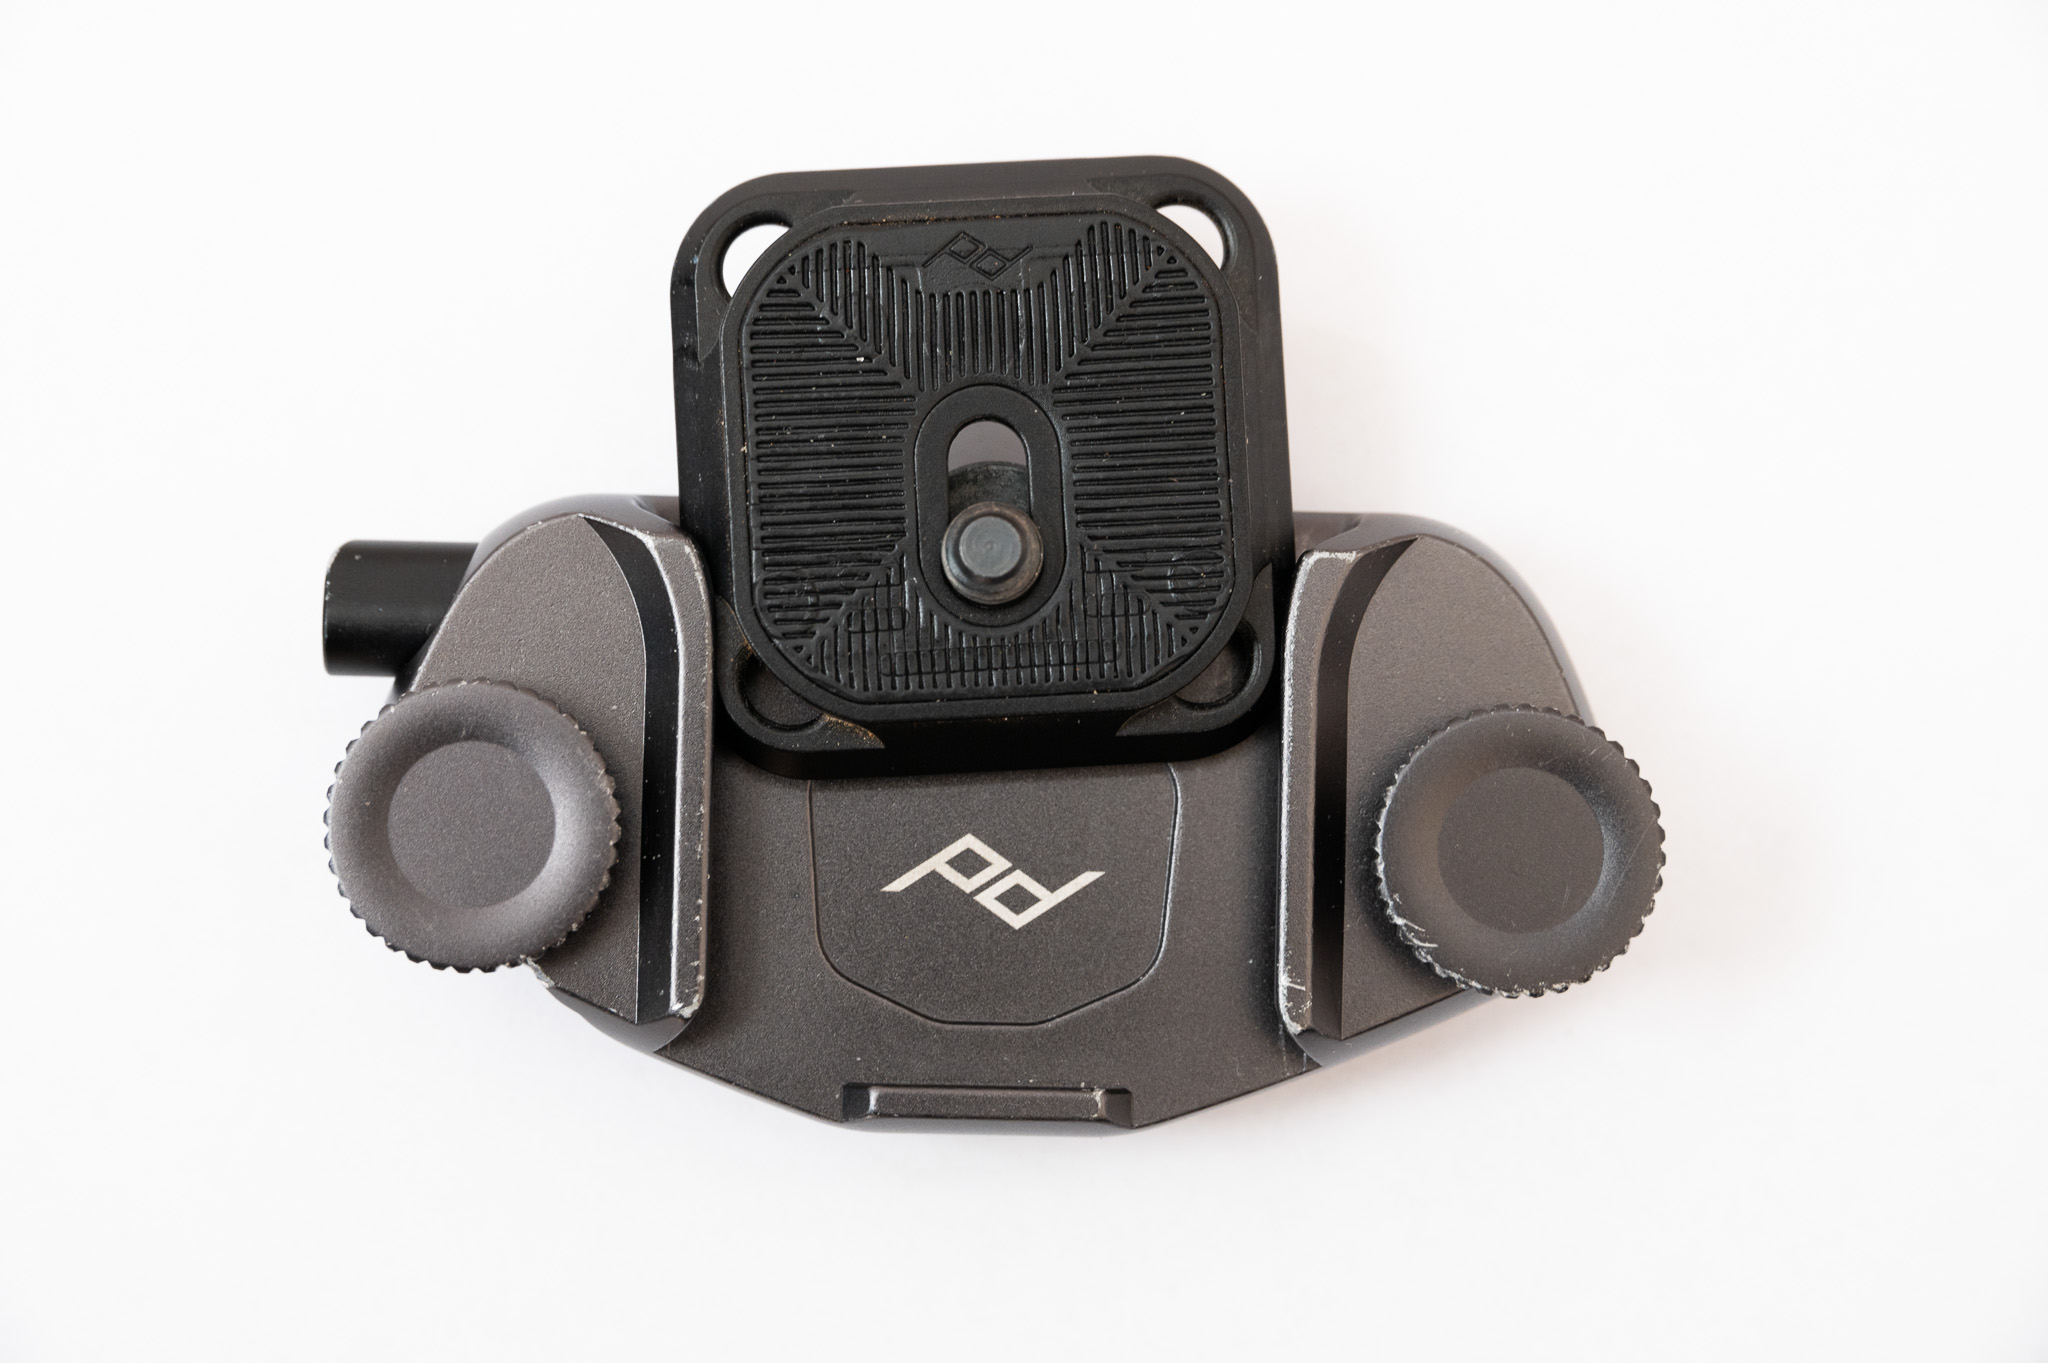
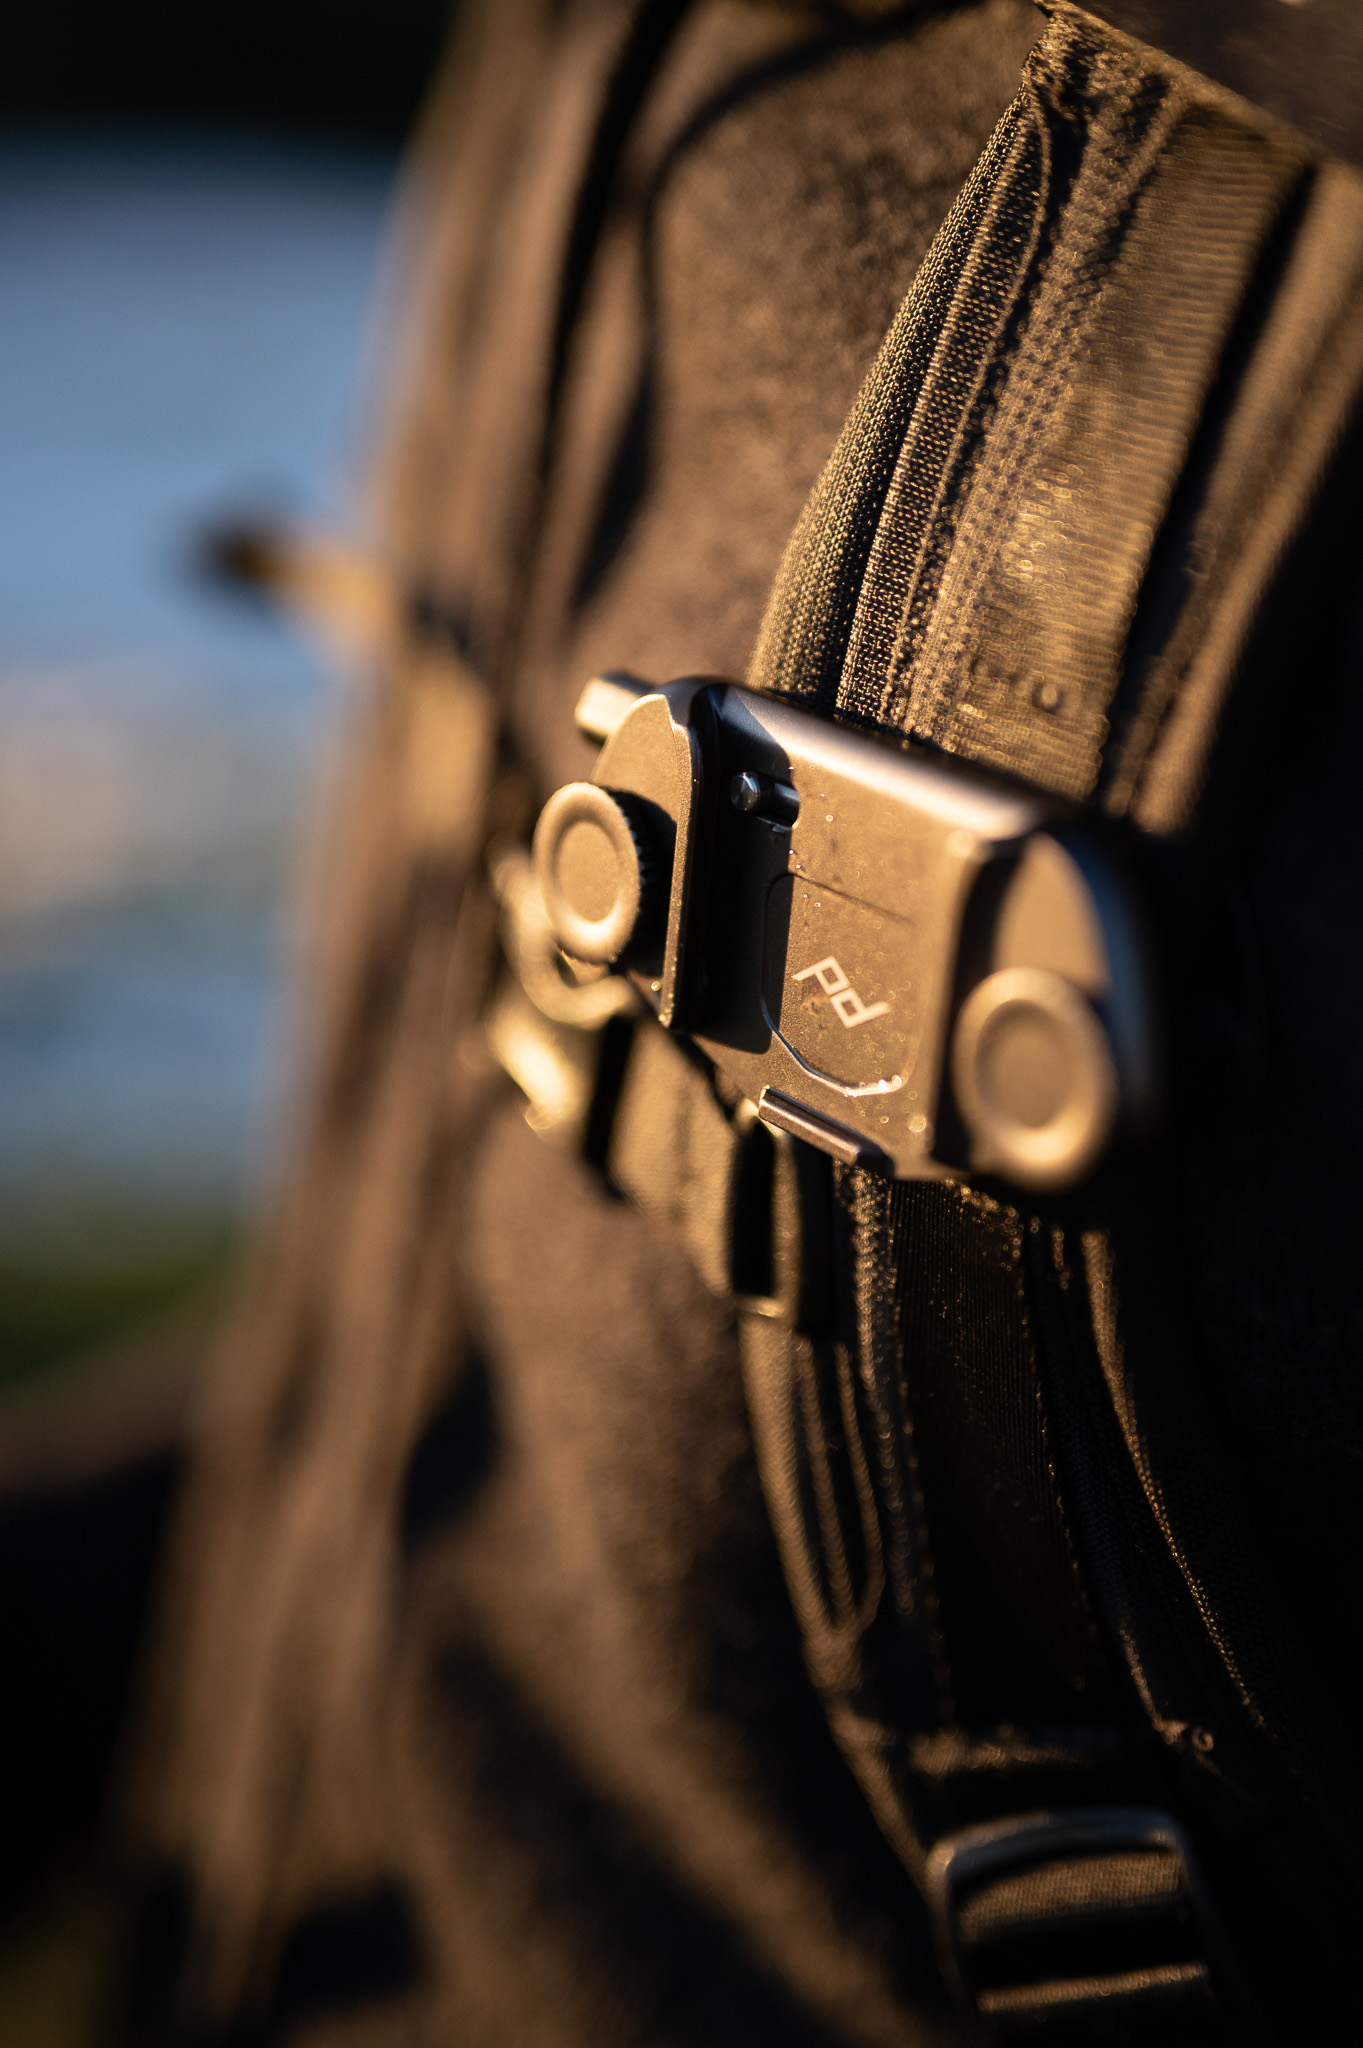
At its simplest, the Peak Design Capture Clip V3 is two metal plates that are held together. One of the plates attaches to the bottom of your camera just like any tripod plate. The other attaches to a strap on your bag (or any similar location, like your belt) and holds the first plate in place. Since the plate at the bottom of your camera is Arca-Swiss compatible, the system can work with any of your existing Arca-Swiss type tripod plates.
Essentially, that’s it. The mounting plate is compatible with any strap or belt up to 2.5†wide and 0.6†thick (or 0.88†thick with the included hex bolts). It then acts in conjunction with the standard plate as a very secure location to mount your camera.
Specifications
- Clip Dimensions: 8.3 cm (3.3″) x 4.0 cm (1.6″) x 2.0 cm (0.79″)
- Plate Dimensions: 3.8 cm (1.5″) x 3.8 cm (1.5″) x 0.7 cm (0.3″)
- Materials: CNC-machined aluminum, black anodized finish, injection molded PVC pad, steel screws with oxide finish (hex drive bolts) and machined steel and aluminum assembled screws with anodized finish (hand drive bolts)
- Clip Weight: 70 g (2.5 oz) – includes 2 thumb screws
- Plate Weight: 14 g (0.5 oz)
- Total Weight: 84 g (3 oz)
- Strap Compatibility: Fits any strap up to 6.4cm (2.5â€) wide and 1.5cm (0.6″) thick with standard thumbscrews or 2.2cm (0.88â€) thick with included hex-head clamping bolts.
- Strength Rating Over 200 lbs (90 kg)
- Warranty: Lifetime

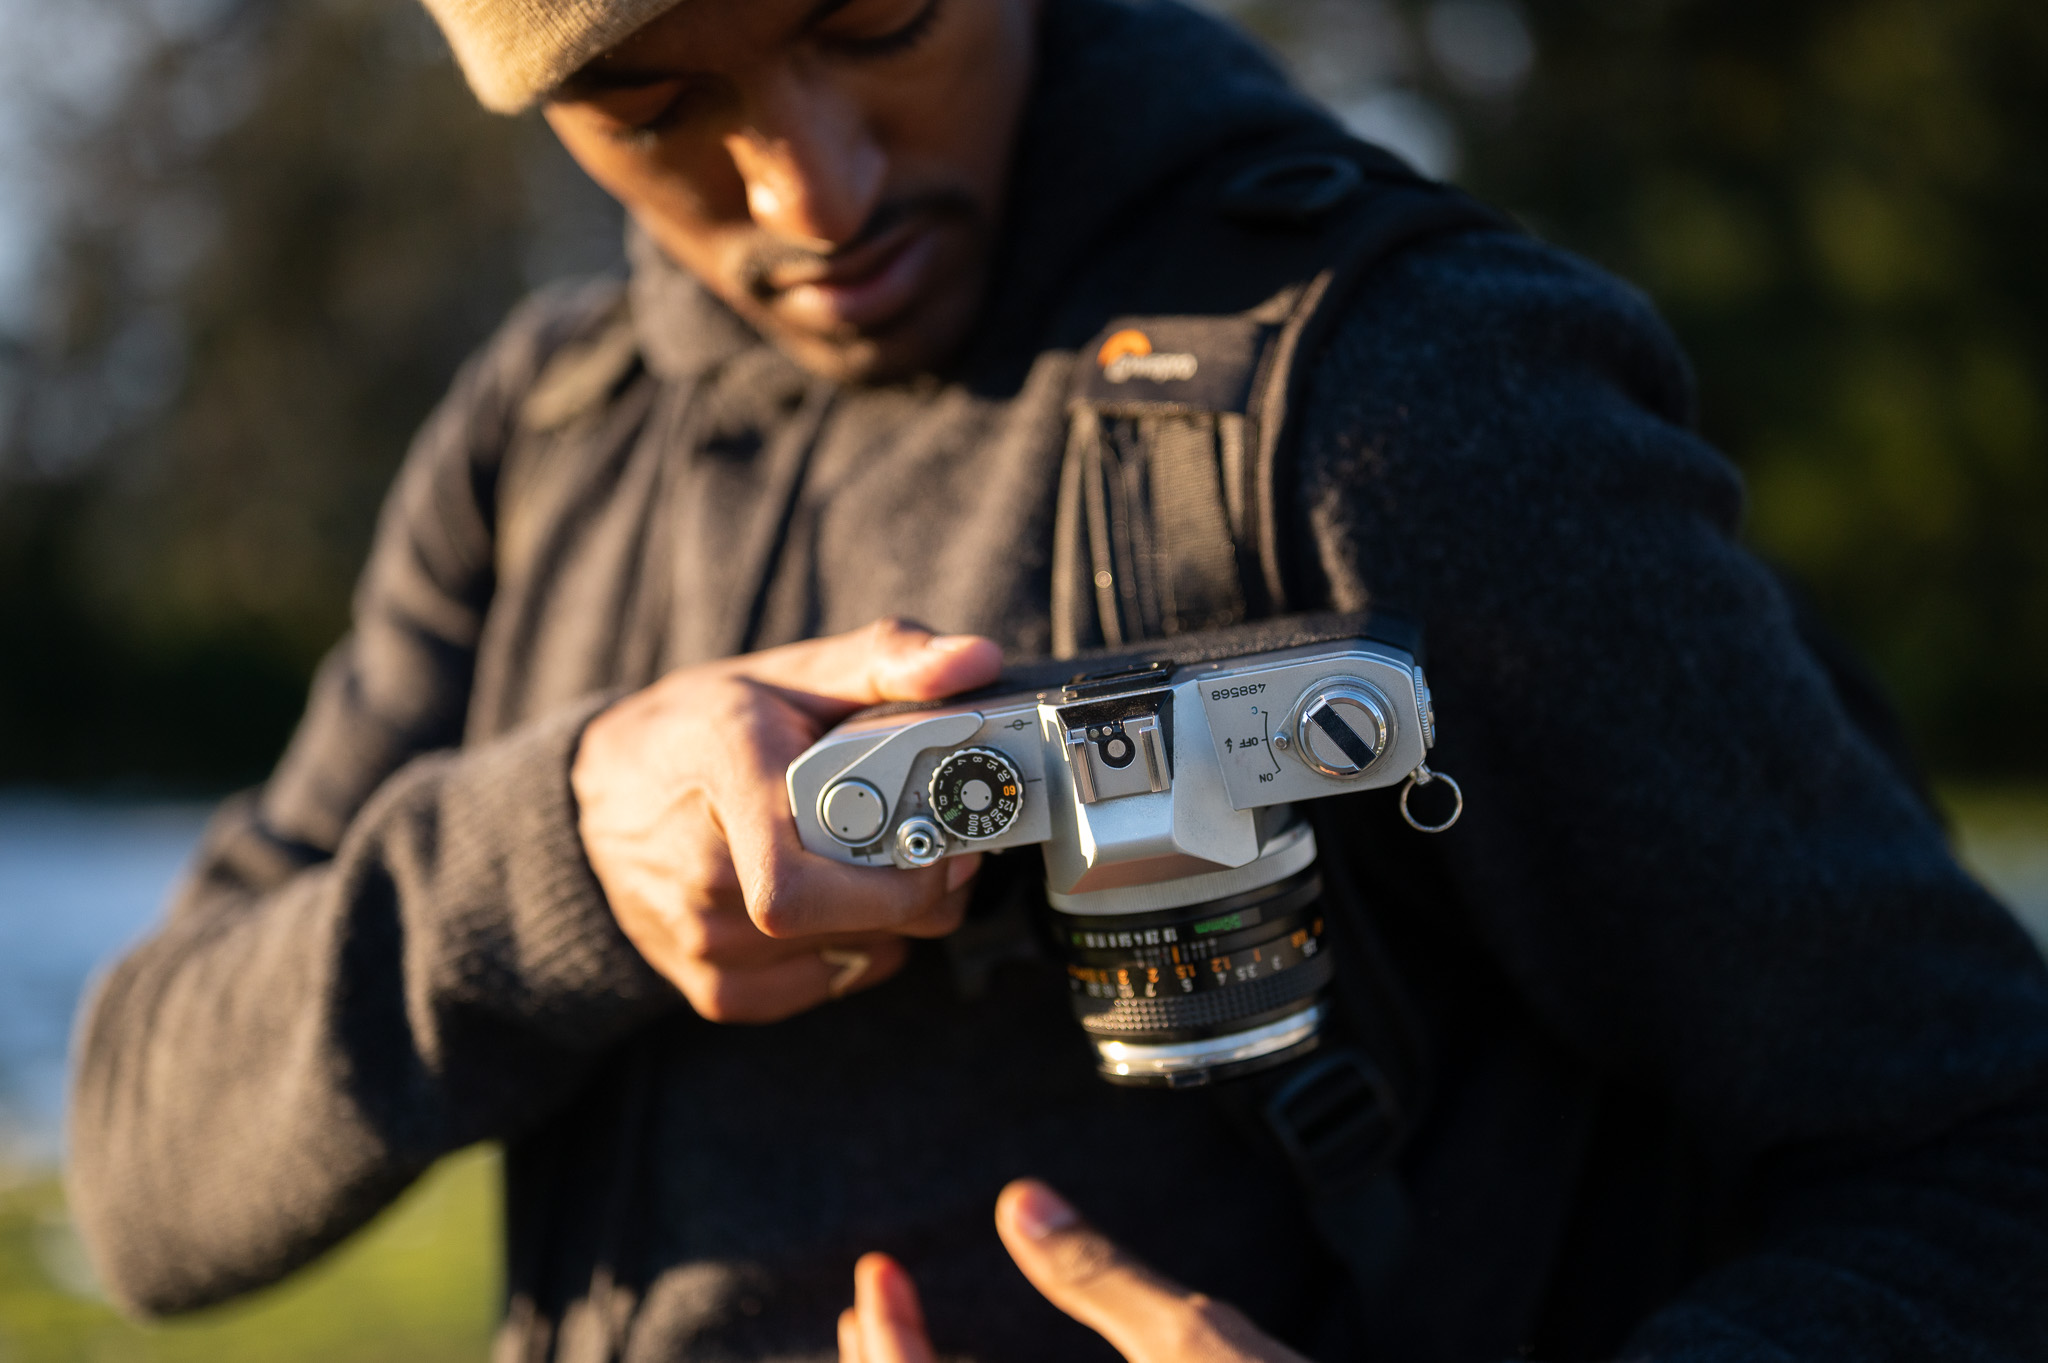
How Do You Use It?
As far as I’m concerned, the Capture Clip could be used wherever you can imagine using it. As long as there is a place the metal plates can grab on tightly, it can be used to mount your camera.
The two intended and most typical locations however are either on a belt, or the shoulder strap of a camera bag/backpack. Peak Design’s bags are often designed with extra straps specifically for mounting the Capture Clip, as well.
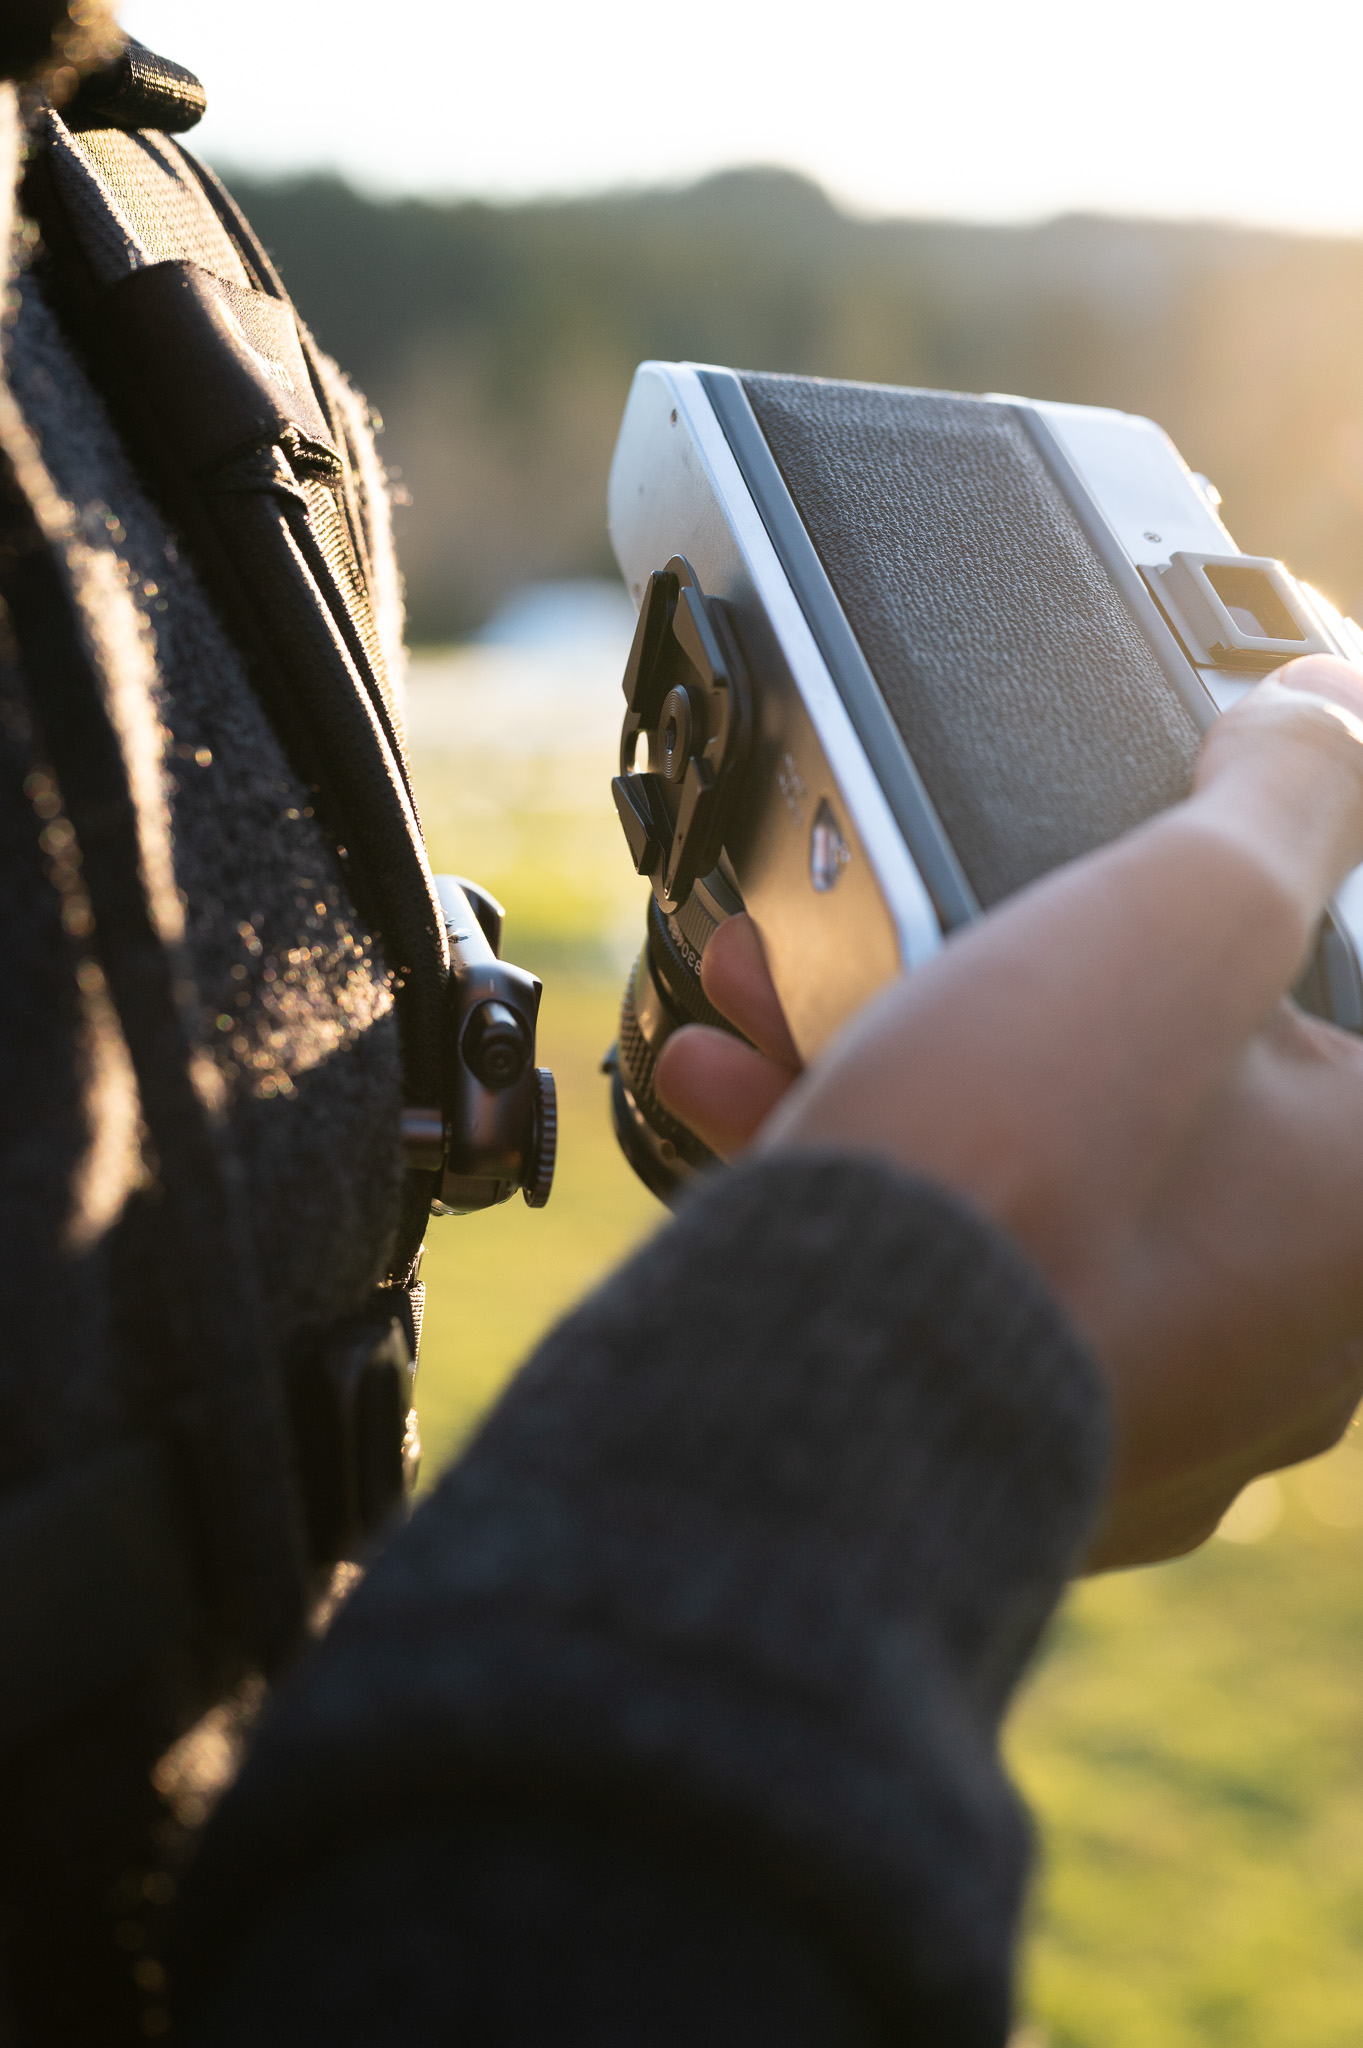
1. Shoulder Strap Mounted
This is an excellent location because most photographers use a camera bag already to keep their gear with them. With the Capture Clip attached to a shoulder strap, it creates an in-between place to store one’s camera – not stashed away in the bag, nor in one’s hands. Instead, it’s right on one’s chest ready to go. Here, the weight is also nicely distributed onto a strap that is meant for load bearing.
2. Belt Mounted
This is kind of like a geeky cell phone holder, right? In all seriousness though, attaching the Capture Clip to your belt is a great option. Just like a a fanny pack!
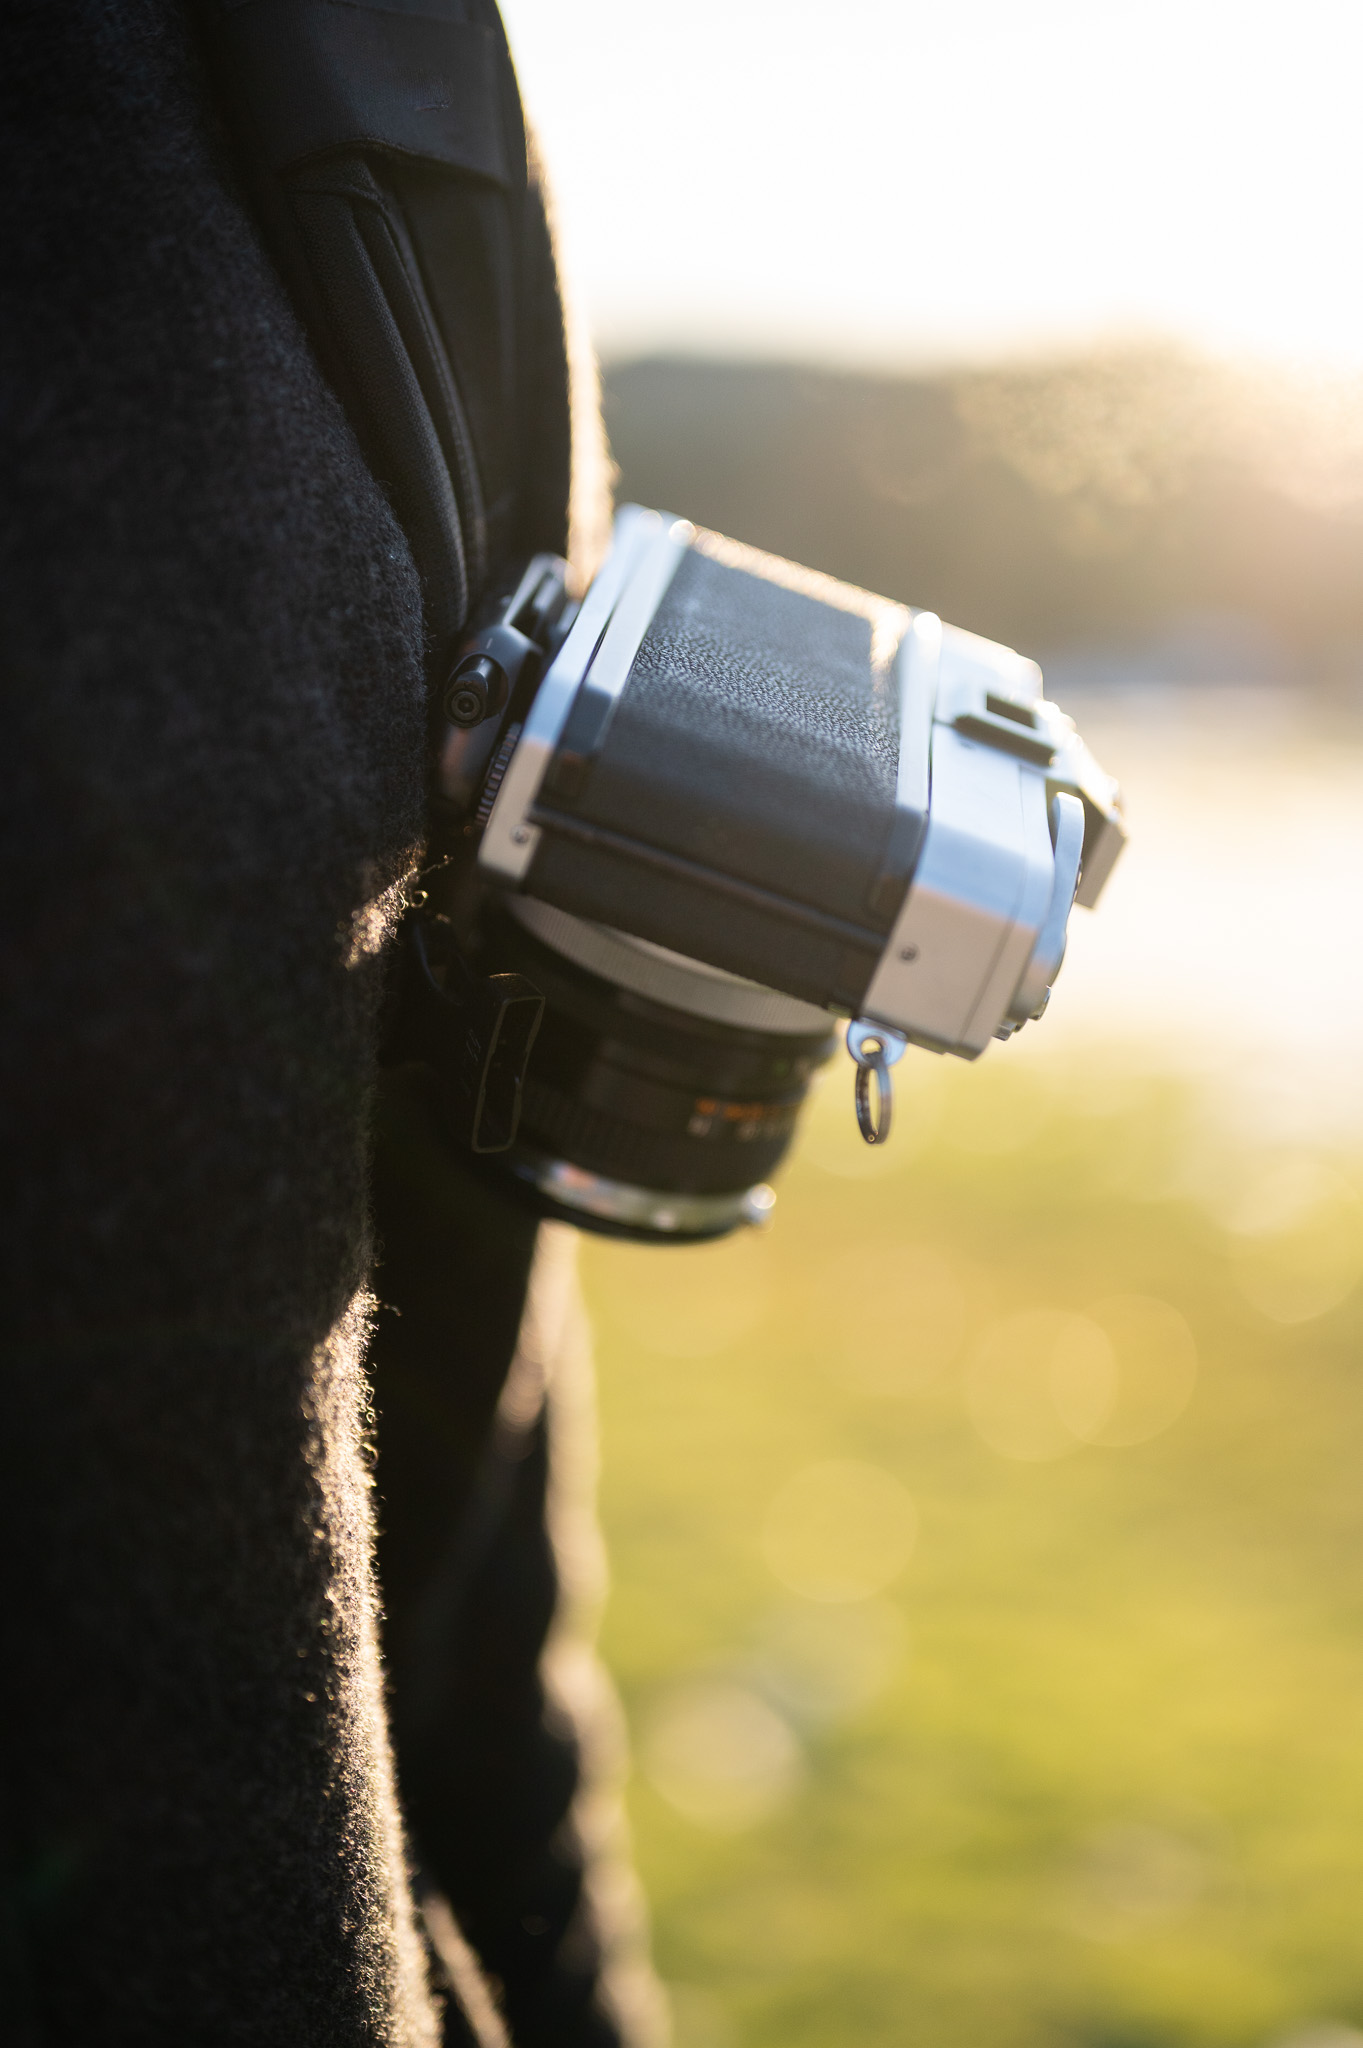
In this case, you’re flipping the direction of the Capture Clip so that it attaches to a horizontal belt rather than a vertical strap, but the result is otherwise the same. An interesting design aspect of the Capture Clip is that the standard camera plate (unlike many Arca Swiss style plates) is completely square and therefore symmetrical. It can slide into the capture clip in any direction, so whether you want your camera pointed up, down, or sideways, you can do so easily.
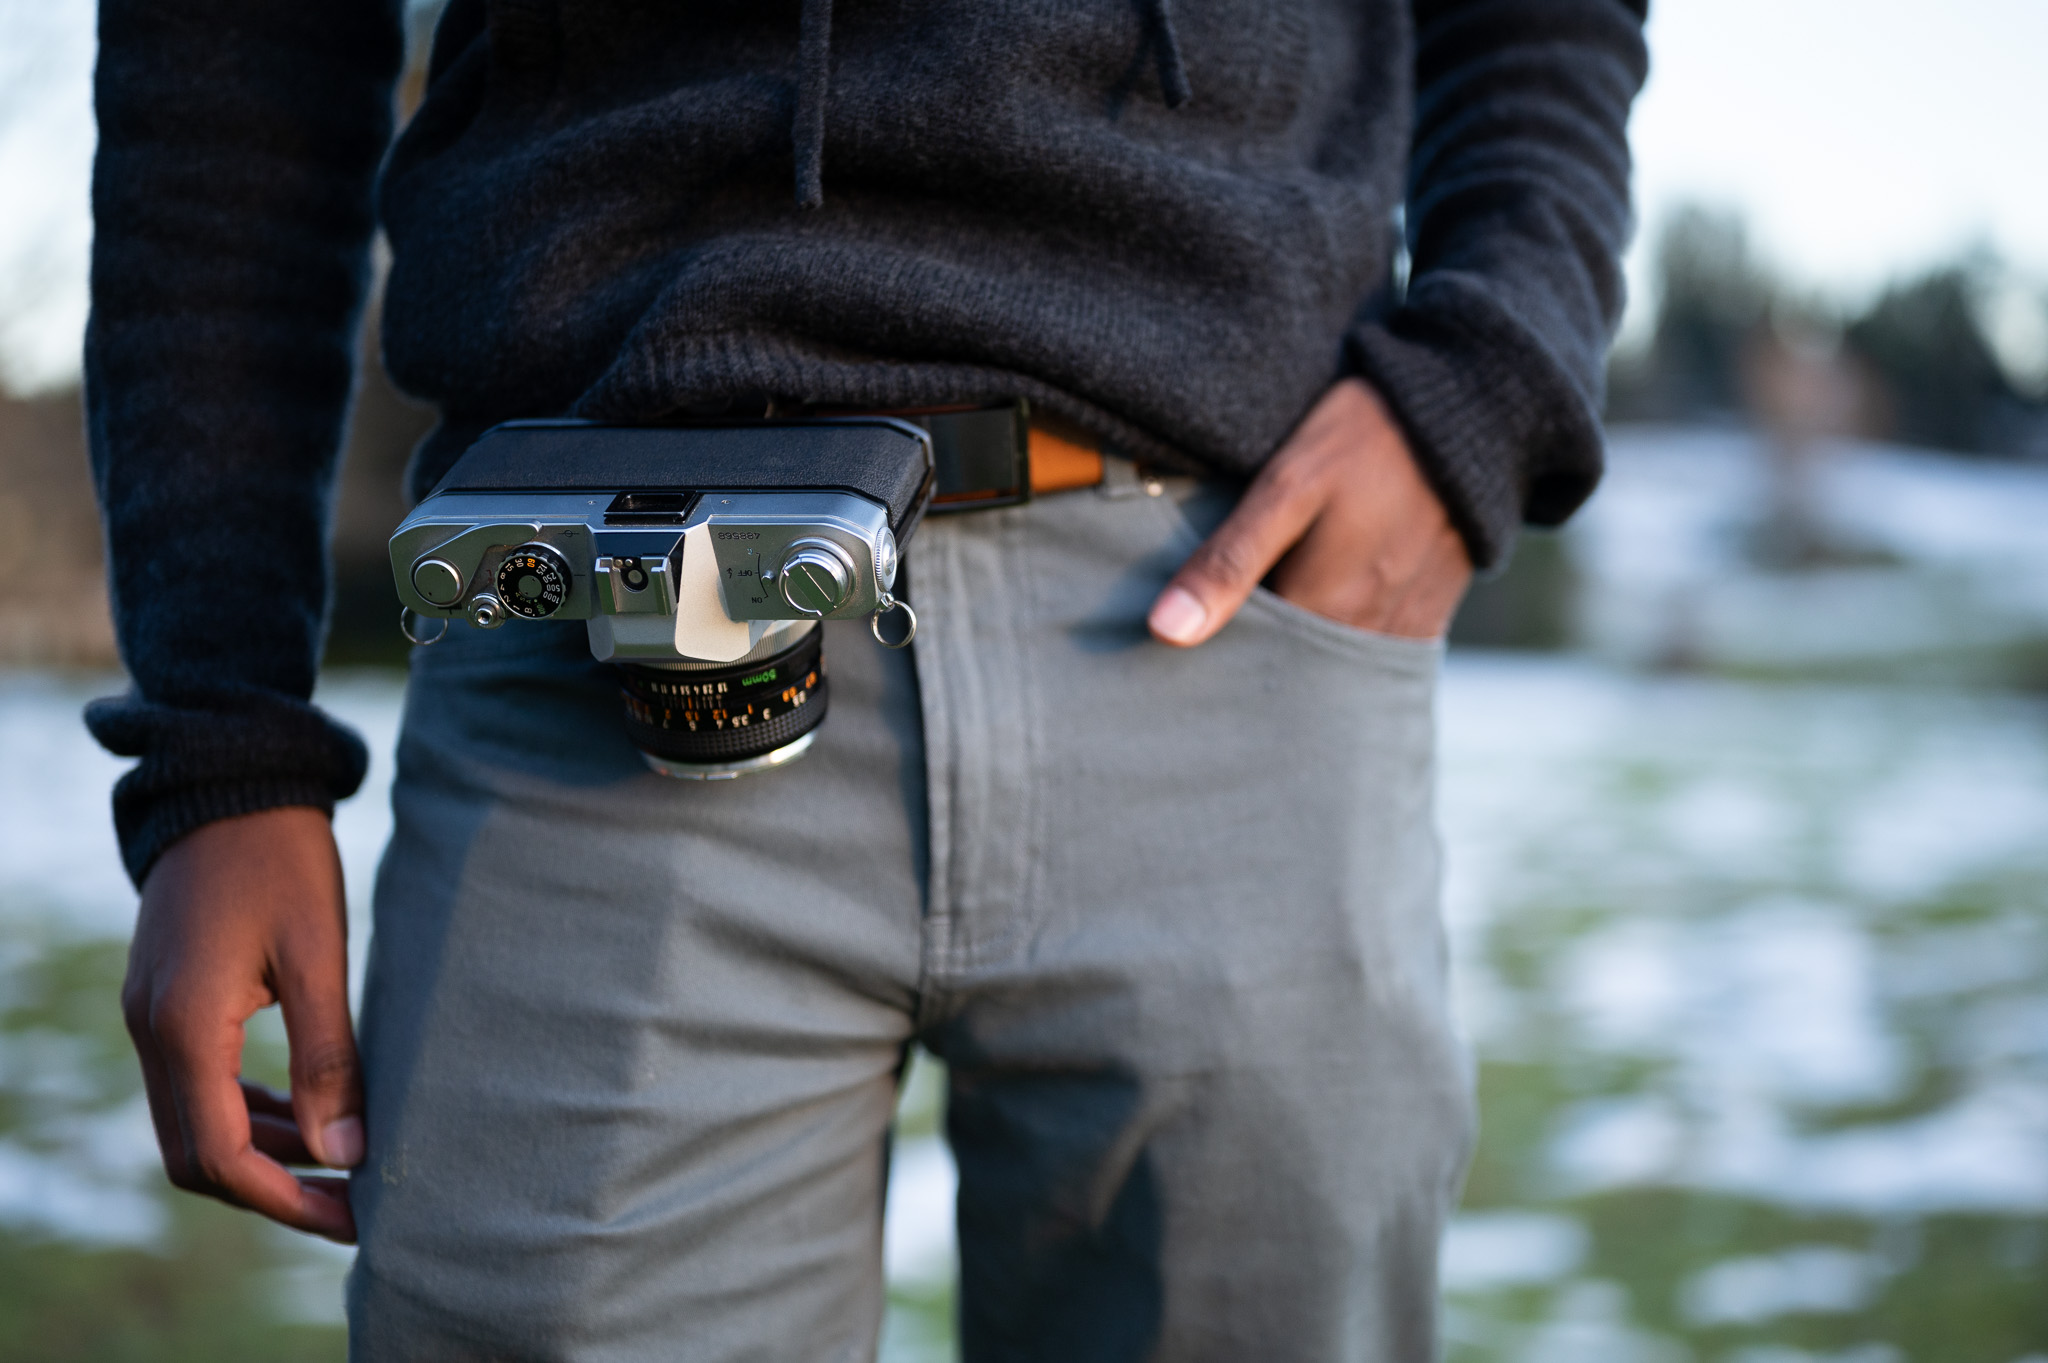
There are two main locations that I’ve seen photographers attach the Capture Clip to their belt: at their hip and at the inside of their leg.
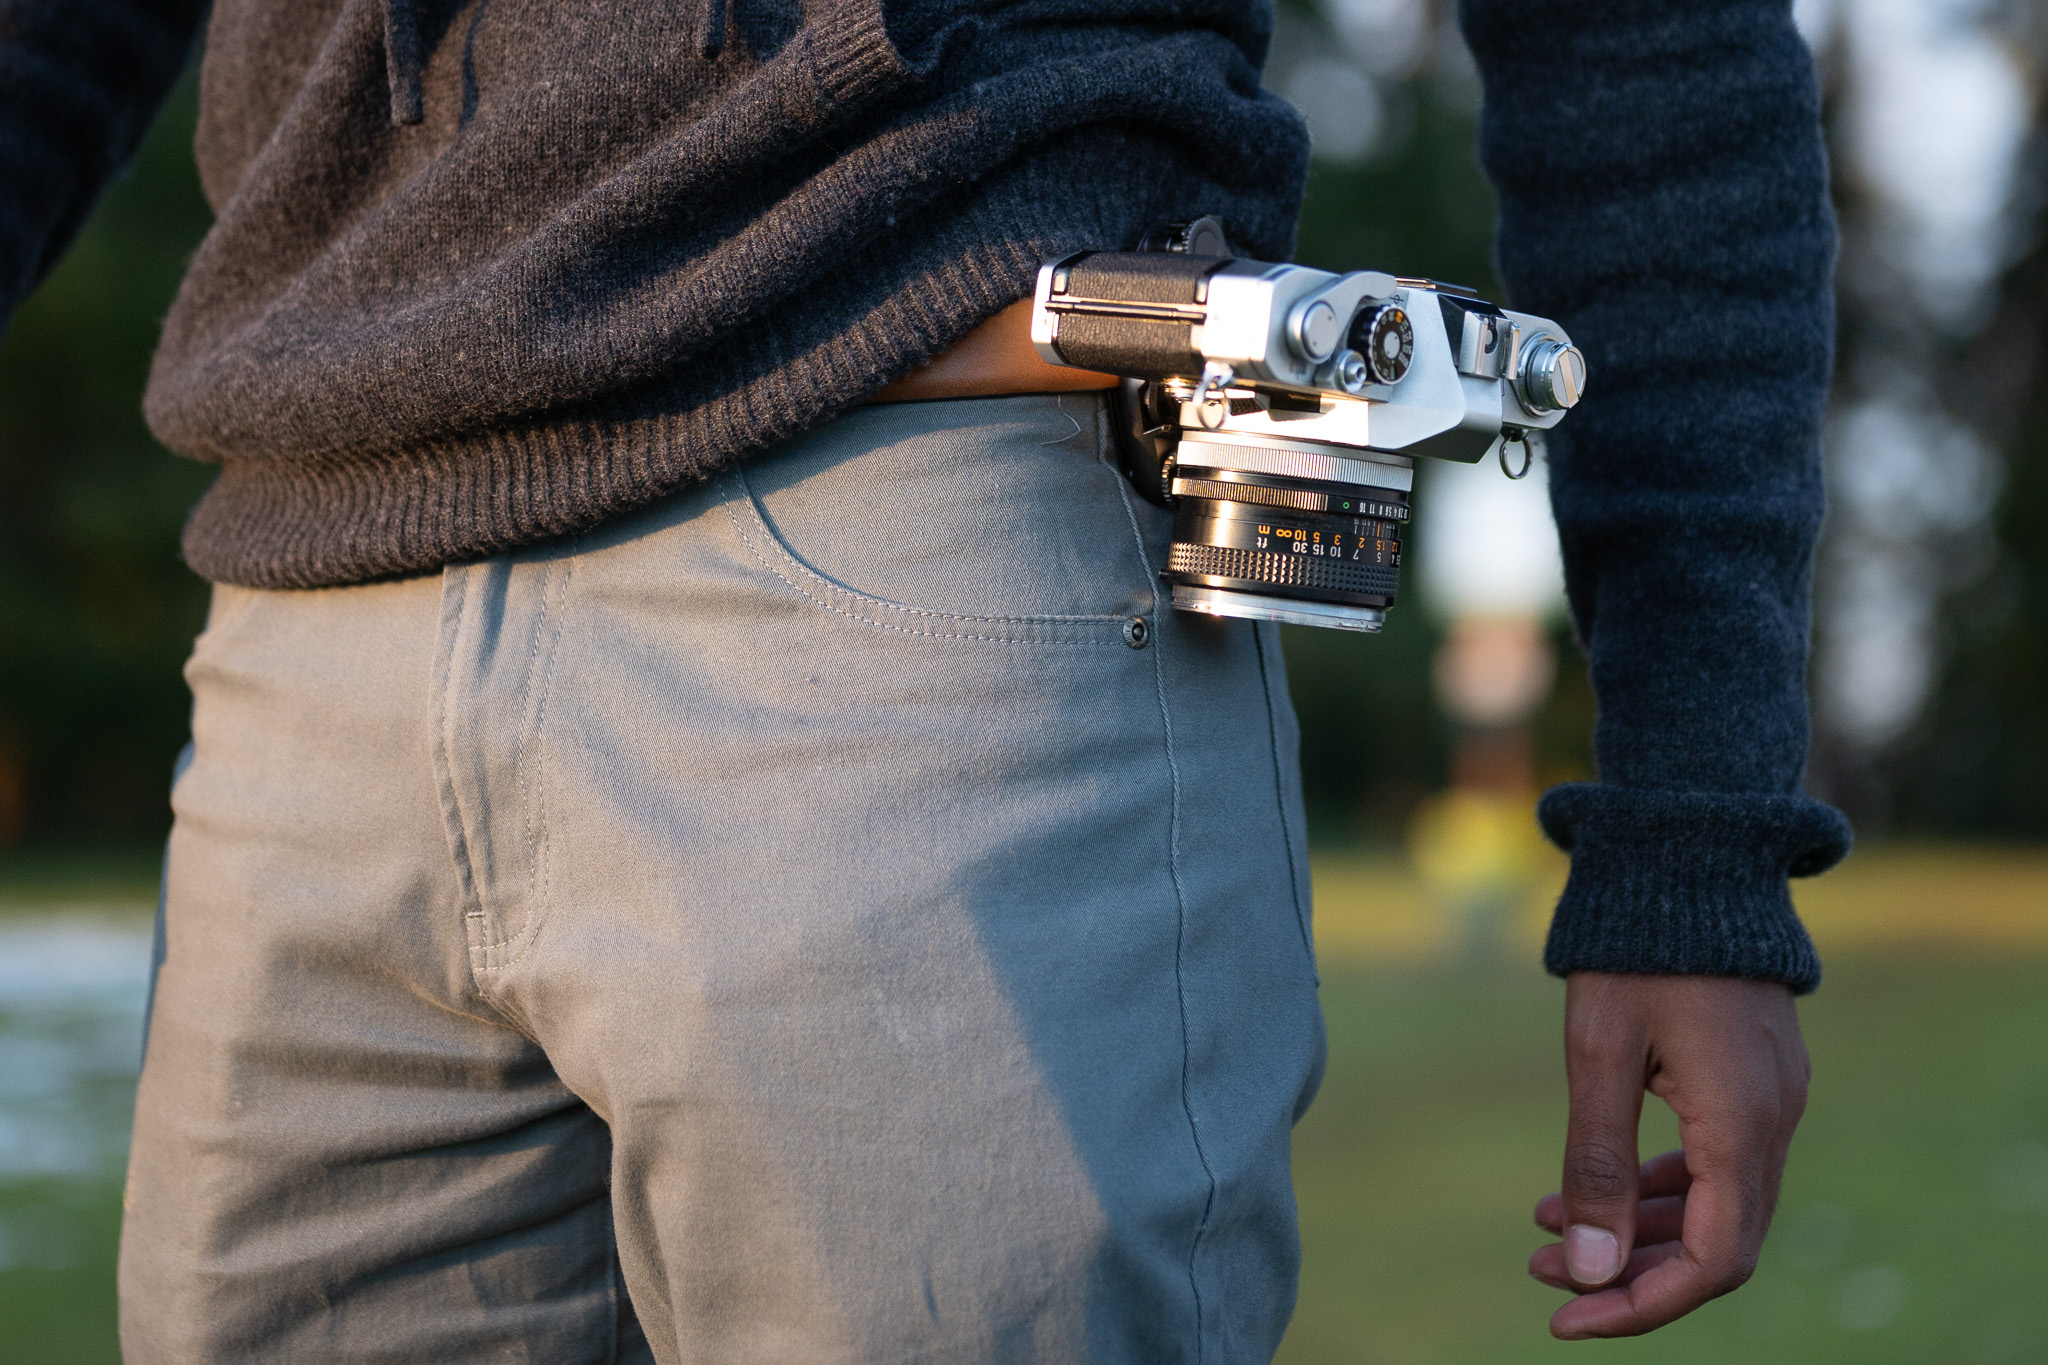
2.1. Belt-Mounted at the Hip
Peak Design’s website shows this location for belt mounting. This can work fine, but also makes me a little nervous for one reason. Most people are used to moving about the world in their bodies, at the size they are normally. But when your camera is at the hip, it becomes an extension of your body and is easy to bang on something them turning or moving through a tight space. Yikes!
The idea of banging my camera or lens on a table or door frame is most unsettling. I like to know my gear is protected from the outset, so I don’t use this location for attaching my camera to a belt.
2.2. Belt-Mounted at the Inside of the Leg
This option eliminates the sideways extension at the hip issue. By positioning the Capture Clip just inside either leg, one’s camera becomes easily accessible with less fear of damage. I also find that because the lens isn’t off to either side, walking movements are largely unimpeded. This is often how I use the Capture Clip, at least when my camera is light enough that it’s not uncomfortable to attach it to my belt in the first place.
Usage Compared to Harness Systems
As I mentioned earlier in this review, the Capture Clip can be of use wherever you might imagine attaching it. Mainly, I see its application in landscape or event photography. I furthermore see it as an alternative for harness systems, which are often used for events like weddings or portrait sessions.
- Landscape: Dramatic light, birds on the horizon, fog, crashing waves. All these elements can appear and disappear very quickly or change from one form to another in a split second. The readiness of this holder system – keeping your camera out of your bag and quick to access – means you can be ready for fleeting images more quickly. It also adds very little weight at just 70 grams and is not very intrusive. Furthermore, the standard plate also functions as a tripod plate compatible with most tripod heads, which is a must-have for a landscape photographer.
- Event or Portrait: Similar story here, this system is about quick-draw and keeping one’s hands free. Often during an event, even if you’re supposed to be the photographer, you’ll need to keep your hands free to do other things. Moving lighting equipment, transporting someone’s purse or other item, straightening someone’s tie, or helping intercept a kiddo dashing for the exit! In these unexpected moments, it’s best not to set down or stow away your gear, and a system like the Capture Clip helps a lot. Two Capture Clips can also make it easy to shoot with the “two bodies and two primes†setup without needing to reach into your bag to swap cameras.
But how does all this compare to a harness system, which is often the standard in event photography?
First of all, harness systems can just look professional, such as the HoldFast Money Maker that Adam Sheridan recently reviewed here. Leather straps against a nice button-up or blouse and the gunslinger-like crisscross on one’s back is cool and hip.
The holster look of the Capture Clip is also professional looking, though; this difference is subjective. It doesn’t stand out as much, which can be good or bad depending on how you want to look for the event. the Capture Clip is also a smaller piece of gear to stow, transport, and think about.
The main drawback of harnesses, in my experience, is how cameras dangle when not in use. This makes me worry that my cameras might swing into something, or into each other, which is anxiety-provoking and distracting. And similarly, when I kneel down to grab gear, the dangling camera in a harness can swing down toward what I’m reaching for (and sometimes all the way down to the ground).
Fully detaching your camera is also easier from the Capture Clip compared to a harness system, especially if you need to then attach the camera to a tripod. Let’s say a couple getting married wants an old school documentation of their ceremony, just a camera set up filming what happens (I have had to do this). With a harness, you need to detach the camera from the harness and re-attach it to an Arca Swiss plate before it’s ready to go.
That said, harness systems have a big advantage of their own. In order to get the camera from stowed position to shooting position with a harness, you just need to pick it up and shoot. With the Capture Clip, you need to press a locking pin and guide the camera out of the grooved mounting channel before it’s in your hands and ready to shoot. Likewise for putting the camera away. With a harness system, you can just let the camera fall to your side, whereas the Capture Clip requires you to slide it back into position correctly. The difference is only a matter of seconds, but for fast-paced events, it can be important.
I prefer the minimalism, lack of straps, lack of dangling, ease of use, and versatility of the Capture Clip over a harness. But darn those harnesses look cool, and yes, I’m also glad to own one and have it as an option when need be.
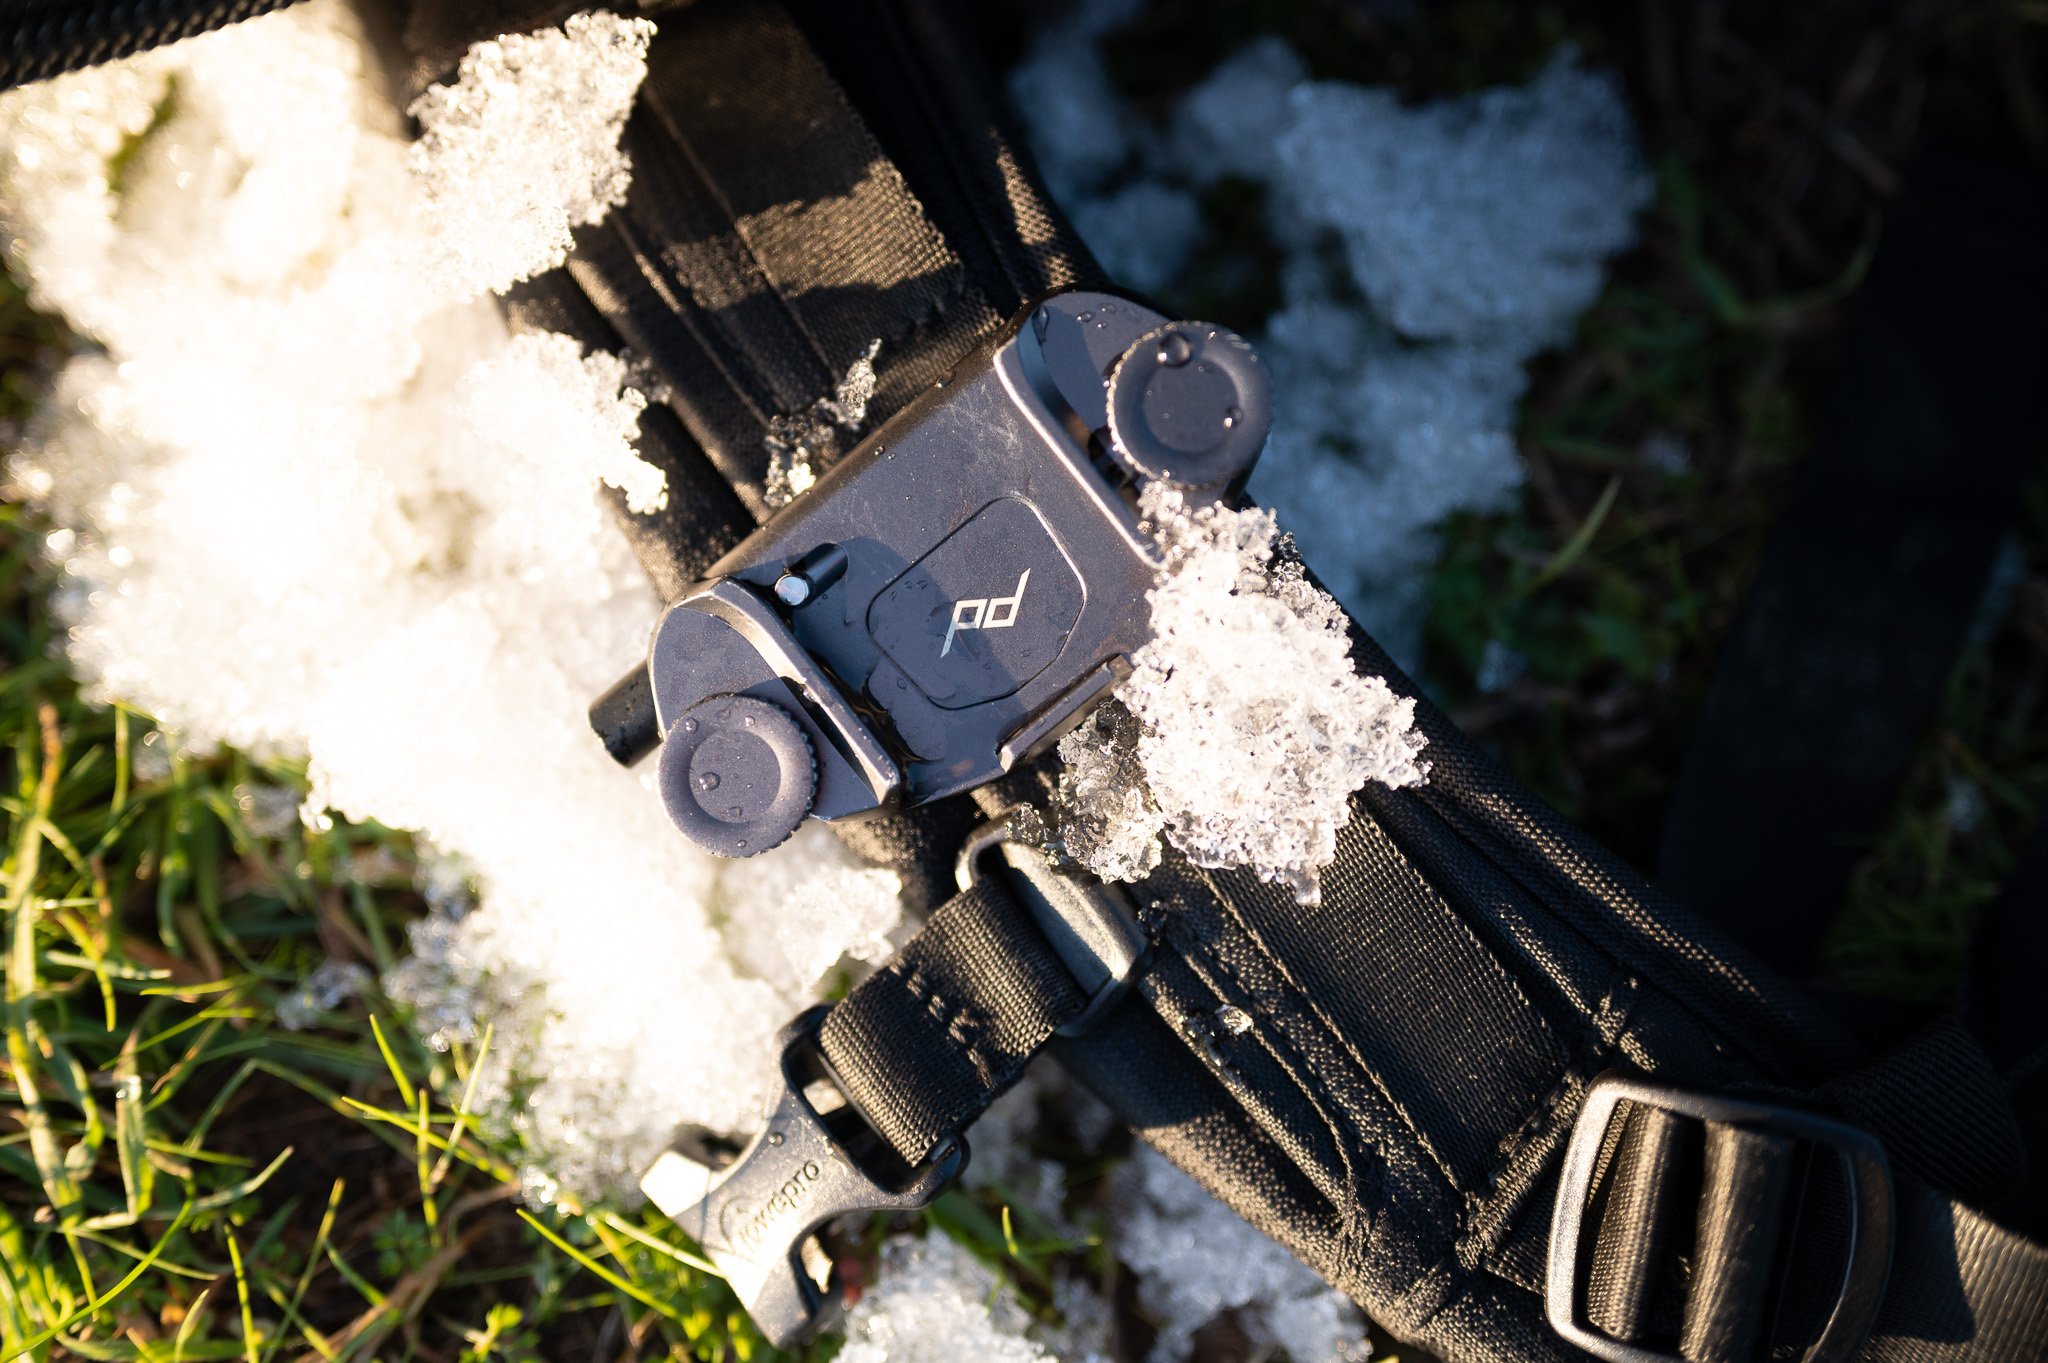
Dependability and Durability
A strength rating of 200 pounds is ridiculously reassuring. You could mount a person on it. I’m assuming there’s no photographer alive who uses a single camera and lens setup that gets close to that weight.
It makes sense: Engineering anything that is load-bearing should incorporate multiple factors of safety. In other words, you never design something to carry the exact weight you need. You want multiple times higher capacity. The strength rating is reassuring in this respect. In all my use of this product, it has never failed, and I’ve never sensed that it might. I’ve learned to trust it, which is an important feeling to have for equipment like this.
Creating a superior product comes from smart design, as well as employing high quality materials and manufacturing methods. This applies to the Capture Clip given the use of aluminum alloy and stainless steel, and the lifetime guarantee. While this review does not extend to an audit of manufacturing practices, Peak Design does have a good reputation for consistently delivering high quality products. My experience with the Capture Clip is in line with this reputation.
Compatible Products by Peak Design
The Capture Clip is part of a small ecosystem of Peak Design products:
- Pro Pad: The Pro Pad wraps around a belt and acts as an expanded padded surface for the Capture Clip to attach to, increasing comfort and stability when attaching large or heavy gear.
- Lens Kit: An attachment that slides into the capture clip designed to hold lenses. This is basically a standard plate with a circular extension on which one can directly mount two lenses. Produced for either Nikon F, Canon EF, or Sony E/FE mounts.
- P.O.V. Kit: A standard plate and plate with a male tripod thread connected by a dual articulating (pan-and-tilt) arm. For mounting small action cameras, like a GoPro.
- Bino (Binoculars) Kit: A standard plate with curved metal extension designed to attach to the bridge between binocular optics. Allows for the mounting of binoculars on the Capture Clip or a tripod.
- Creator Kit: Part of Peak Design’s smartphone accessories called Mobile. This is a standard plate and magnet system designed for securely mounting a phone in conjunction with the Peak Design Everyday Case.
Areas to Improve
I do not have many criticisms of this product. It could be less expensive, being a small piece of metal that runs $50 for the clip itself and $70 for both the clip and standard plate. However, given the high quality of materials and high functionality, it doesn’t leave one feeling ripped off in any way. It’s not a bargain, but it’s worth it.
At a weight of 70 grams for the clip and 14 grams for the standard plate, it’s also a very light accessory. But as a photographer who hikes a lot, I’m always delighted to shed any amount of unnecessary weight. As such I’d be interested in a lighter alternative to aluminum and steel, perhaps carbon fiber. Even at a higher cost, this would likely be a consideration for many creators like myself.
Here’s one final thought I’ve had regarding potential improvements. It could be possible to use magnets to mount the plate to the clip. I’m sure this is no easy task and would require extensive design, which I’m admittedly not about to devote my time to. So, simply in the spirit of wish-lists I’ll just throw it out there. It would be mighty cool if, instead of a mechanical locking relationship between the clip and plate, there were a magnetic one. It would solve the issue of having to guide the standard plate into the clip, which could save time deploying and stowing one’s camera, thus improving ease of use.
Conclusion and Rating
The Peak Design Capture Clip V3 fulfills an integral need for photographers – ensuring immediate and unencumbered access to your camera. It does this with elegance and durability, and in such a way that it’s hard to imagine anything else being more than marginally better, if better at all. That’s why it is a ‘wheel’ of a product; it performs in accordance with the essence of its purpose. For me, it’s a staple because it improves my ability to be mobile and execute shots as I feel inspired to do so. As the best kind of gear does, it facilitates photography.
If you are interested in purchasing a Peak Design Capture Clip, below are several options. It is not always easy to find in stock, but should be available in at least one of the following stores at any given time:
Let me know below if you have any questions!
Peak Design Capture Clip v.3
- Build Quality
- Handling
- Ease of Use
- Value
Photography Life Overall Rating
 Started out doing photography at the age of 6 using an uncle's old 1940 kodak brownie box camera. At 15 years of age, I decided to buy my very own 1975 Praktica SLR camera. I now shoot with a Nikon D850. I do unpaid TFP and commercial paid work.