


Tips for Photographing Birds in Flight
This article introduces some key concepts to photographing birds in flight. One of the most necessary ingredients is patience; you may often photograph an entire day and not get one usable image. In most cases there is some luck involved to being in the right place at the right time. Hopefully this article will provide some information to help you improve your luck.
Choosing a Location
Let’s begin with choosing the best location for your birds in flight shoot. Near rivers or lakes are great locations, because of the abundant food sources for the birds. Find a position on a hill that will put you at eye level with the birds. Check out the position of the sun, because you should not be shooting into it. Light coming from behind you or from the left or the right of your position is preferred. Also, birds will generally take off and land into the wind, so knowing the wind direction of your location will help you predict the flight direction of the birds you are photographing.
Lighting
Good lighting plays an important part in successful birds in flight photography. As in any other kind of outdoor photography, the golden light of morning and evening are best; however, because you are shooting at birds in the sky, these times can be extended and still have nice lighting on your subject.
Make Yourself Invisible
Some birds will not venture near a human presence, so you need to make yourself the least visible as possible. In some cases it might be as simple as not wearing brightly colored clothing, but avid bird photographers may also want to set up some kind of blind. These can be purchased inexpensively from most hunting stores. Also, sitting will make you less noticeable to the birds than if you are standing.
Study Your Subject
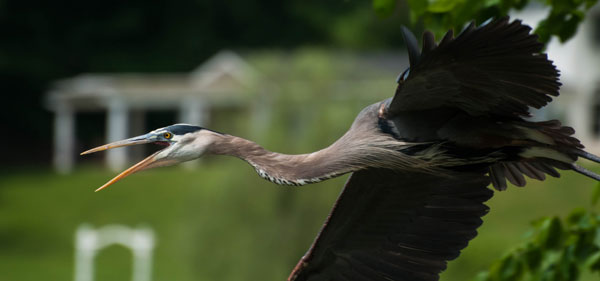
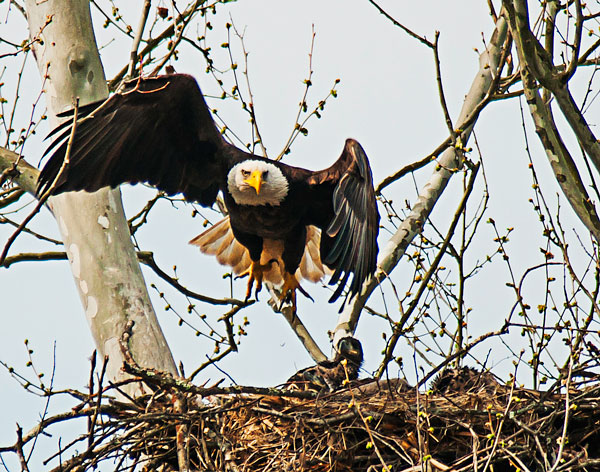
Study the birds you enjoy photographing to learn their habits. This can help you predict their movements. For instance, many birds, especially the larger species like herons or eagles, will relieve themselves just before they fly. Knowing this can help you be ready to shoot when they take off.

Lens
Choosing your lens can be a challenge so be advised that you should use the fastest and largest mm lens you can afford. For your best chance at a great shot, you would want at least a 300mm lens, but a 500mm to 600mm prime lens is preferable. Unfortunately, these lenses don’t come cheap.
Tripods
A great tripod head for birds in flight, especially if you are using a large lens, is the Gimbal head. It balances your camera and lens and requires very little force to pan left and right, and up and down. A less expensive option is a Pan head, which also allows for movement in all directions on two different axes. The more common Ball head can be used with effect for birds in flight photography, but is not a very stable solution for very large lenses.
Exposure
When you consider setting up your camera to shoot birds in flight, keep in mind how the “exposure triangle†of shutter speed, aperture, and ISO each play an important part in the getting the perfect exposure.
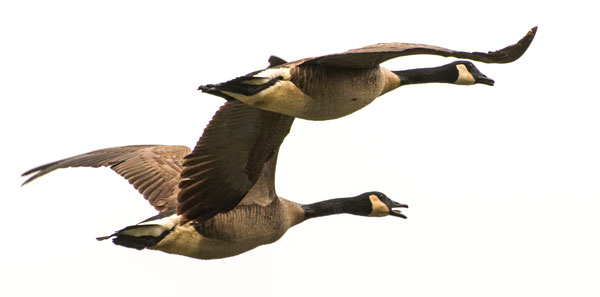
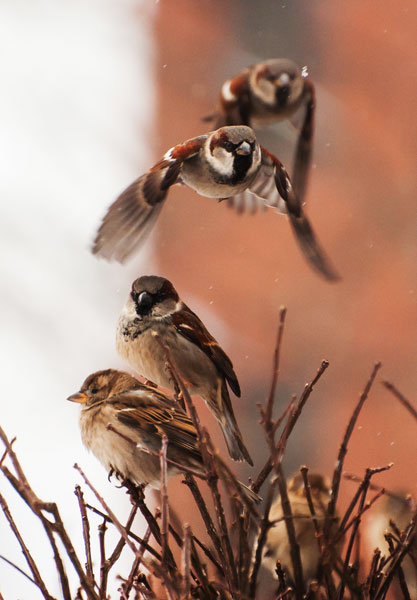
- Shutter speed – You need the shutter speed to be fast enough to “freeze†the bird’s wings in your photo. While small birds’ wings may flap approximately 40 beats per second, larger birds like herons and eagles flap around 2 beats per second. Many species of duck are fairly fast flappers at around 5 to 10 beats per second. So the question remains, how fast should you set your shutter speed to freeze the wing motion? Go for at least 1/1000th of a second to 1/2000th of a second. Even faster is better, if possible!
- Aperture – In order to gain as much depth of field as possible, you want to use the smallest aperture possible. Select your F-Stop (the aperture number) based on your lens’s sweet spot (where your lens focuses most clearly), probably around f/8.
- ISO – You want to keep your ISO setting as low as possible to avoid digital noise (graininess) in your photos, although most of the latest models of digital SLR cameras these days do a decent job with higher ISO allowing very little noise.

So how do you bring all three elements of your exposure triangle together to find the best exposure? You may consider simply using your camera’s Shutter Priority Mode feature in which you set the shutter speed and the camera sets the aperture (and ISO on some models) but try this alternative method.
- Set your camera on Aperture Priority
- Set your aperture to f/8 (the sweet spot) to capture the sharpest image for your lens
- Next, using your camera’s light meter, check the exposures in the space you hope to photograph your birds in flight. You will probably find that you have some areas that are darker than others.
- Using the exposure you get in the darkest area, adjust your ISO to bring your shutter speed up to at least 1/1000. It follows that when your bird flies by and you are panning your camera into a lighter area, your shutter speed will increase to above 1/1000, and when your subject is in the darker area your exposure will still be appropriate.
Now, one final step to tweak your exposure. Have you ever noticed how when photographing birds in flight your image will seem dark and missing detail, especially to those dark feathers? To bring out more detail in those dark areas, change your EV (exposure compensation) setting to +0.3 to add a little more light. Depending on the lighting, you may need to add more. On the other hand, what if you are photographing a white bird, perhaps a swan? The white bird’s image will tend to get “blown outâ€, also missing detail, so adjust your EV value to -1.0 to -2.0 to pick up the detail in those white feathered birds. (If you are thinking your background will be underexposed, well, yes, it will be, but you are photographing the swan, not the background.)
Focusing
To keep your flying bird in focus, set your camera’s focusing mode to continuous focus. In this mode, as long as you have the shutter button depressed halfway and are focused on the bird, the camera will continuously focus with the movement of the bird. Canon calls this function “Al Servoâ€, while Nikon calls it “Continuous Servo†or AF-C. Also both Nikon and Cannon will allow expanding your focal points to look at adjacent points for movement to help you keep the moving subject in focus. Nikon also offers two additional options of Auto Focus – Area Modes that might work for birds in flight. Its 51-point Dynamic Area Auto Focus and 3D Tracking Mode will both search at all 51 focal points looking for the movement of your subject, though these methods may be a little too slow in focusing.
Composition
Composition can sometimes be the most difficult aspect of photographing birds in flight. Not only are you occupied with keeping your bird in sharp focus, you are also trying to make a pleasing composition. All the rules of composition applying to any photo remain valid here. You always want to have more space in front of the bird than behind; a good rule is to have a least two to three times the space in front of the bird. One practice that helps maintain this space is to place your focus point in the center and try to keep it on the bird’s eye. This method works really well on large beaked birds like the heron. While most birds in flight images are just one bird, look for those occasions where you may capture two or three birds for a great image.

Technique
As the bird is flying toward you, quickly get your focus lock. When the subject is close and in the position you like, fire away and keep panning even after you have stopped shooting. This follow-through motion will keep your last image in focus better than an abrupt stop. While panning as the bird flies by, you want to match your panning speed to that of the bird, and depending on your shutter speed, this will help keep the bird in focus while the background may be blurred.
It’s a wildlife photography principle that you want to keep the bird’s eye in focus and sharp. If you are handholding your camera, try to keep your left hand under the barrel of your lens and your elbows close to your body, as this will help you maneuver the camera as steadily as possible. If you are standing, keep your legs spread out to give you a good sturdy base. If you are planning to hold your location and position for a time, using a tripod is recommended to help keep you steady, especially if you are using a very heavy lens.

So stay alert, and look for opportunities to capture great birds in flight images. It will take lots of practice to get that perfect image, but when you do you will be hooked.
Have you tried bird photography before? Want more bird tips, try these:
- 10 Incredible Bird Photography Tips for Beginners
- A Turn of the Head – Creating More Compelling Bird Portraits
- An Introduction to Bird photography
Â
Source Article from http://feedproxy.google.com/~r/DigitalPhotographySchool/~3/o43ahuN898w/
 Started out doing photography at the age of 6 using an uncle's old 1940 kodak brownie box camera. At 15 years of age, I decided to buy my very own 1975 Praktica SLR camera. I now shoot with a Nikon D850. I do unpaid TFP and commercial paid work.