


Walk Through and Review of Autopano Giga – Image Stitching Software
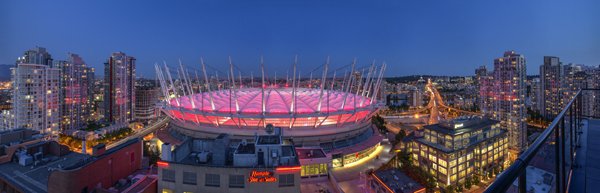
A six image photostitch of BC Place in Vancouver
My first image editing software was Photoshop Elements 6 and the photostitching function was really erratic to say the least. I was doing real estate and architectural photography and needed a reliable and accurate tool that could quickly and properly stitch images together. I tried a few, but was not happy with all the results. The software was difficult to use and the results were irregular.
Then I heard about Autopano. I downloaded a trial and was pretty amazed at how quickly, and more importantly, accurately the software stitched scenes together that other pieces of software had not been able to. The stitching was seamless and effortless. I was impressed with the ease of use and the speed at which the software worked. I had found my tool of choice, Autopano Giga. Autopano Giga is a tool that is made by a company called Kolor. They develop image stitching software, pano tour software and 360 degree software, they are a specialist photography software company.
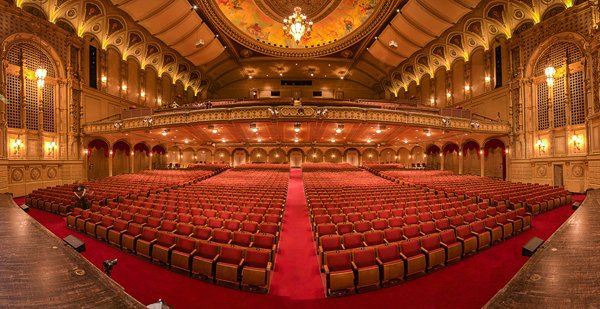
Five shot photo stitched image of the Orpheum Theatre, Vancouver BC
The first step in making effective panoramic images is knowing how to photograph them. That is beyond the scope of this article so for the purpose of this review we’ll assume you have some panoramic images already shot and want to stitch them.
Time to stitch
For the image stitching part of this process, I am going to be referring to the interface in Autopano Giga. This product works extremely well. It has been rated as one of the best stitching packages available. I have used it to stitch some pretty crazy panos together and it has been able to process almost anything I have thrown at it. I have done normal photostitches and I have done some multi-row stitches too. Autopano Giga has handled these with ease, and in some cases I have been pretty surprised how well it worked.
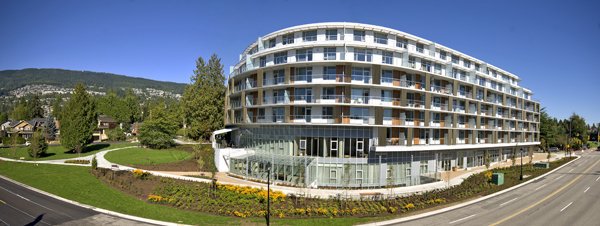
Panoramic images work well for architectural photography
- Open Autopano Giga and on the first screen that you see, click on the second icon from the left to select your images to be stitched.
- Navigate to the images that you have processed and select them.
- Click on Detect on the top left hand side of the screen.
- Autopano Giga will now scan your images and do a preliminary stitch. This preview stitched image will be displayed on the right hand side of the screen that is open. This process may take a few minutes.
- Once the preview image is displaying, click on the Edit button (right-hand side of the screen) this will open the image in the Autopano edit screen. This is where you want to check the image to see that it has stitched together properly, and verify that there are no errors on the image.
- There are a number of options here, below is a high level overview of the most important functions
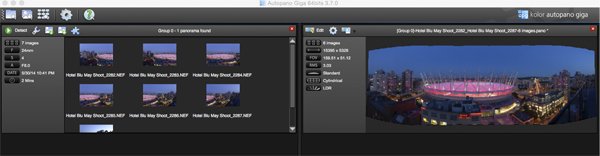
Detection and preview screen in Autopano Giga
Autopano functions on the edit screen:
Autopano has a number of options you can use to render your panoramic image. These projections help with distortion and skewing. Below is an explanation of the most commonly used projections.
- Spherical – The spherical function allows any panorama to be assembled. It is a commonly used option for building panoramic images.
- Planar or rectilinear projection – This is a good choice if the angle is low. It’s recommended for architectural shots because it is the only mode that does not curve lines that are deemed to be straight lines. Sometimes if the angles are too extreme there may be a loss of sharpness, so just be aware of that.
- Cylindrical projection – This projection can be used up to 360° (horizontally).
- Mercator projection – The mercator projection can also be used up to 360° (horizontally). The effect of stretching up and down, the image may seem to become distorted.
- Pannini projection – Keeps vertical lines vertical and straight radial lines. This can give a strong sense of perspective on views whose horizontal field of view is wide, and has a single and central vanishing point. It can however makes horizon lines seem curved. This can be corrected in the sliders that pop-up when you are editing in this projection.
- Little planet projection – The Stereographic projection (also called fisheye projection) can be used to create a little planet. A right way up panorama achieves a planet effect and a backward panorama (180° rotation) makes a tunnel effect. Allows you to create an original view of a panorama, mainly using equirectangular panoramas (360°x180°). Using this projection with panoramas, whose horizontal field of view is less than 330°, is neither aesthetic nor usable.
- Hammer projection – This projection is similar to a flattened world map, mainly used in astronomy applications. I use this for cityscapes too as it can correct some perspective distortion.
- Orthographic projection – This is the view point of a sphere, whose panorama is viewed from afar, mapped to the outside and not inside like most other projections.
- Mirror ball projection – This projection is the result of a visualization of the whole panorama on a spherical mirror, like looking into a crystal ball.
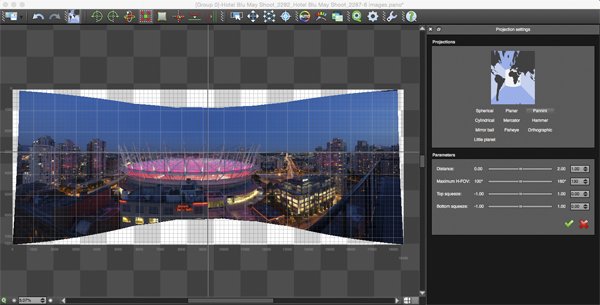
Projection function in Autopano Giga
 Some of these projections are more useful than others. You may find that you will end up using only two or three. A good idea is click on each of them to see how they affect your image. The key factor in choosing a projection is in how the it affects your image visually. Does it work for the subject matter? Does the image look correct? Is the perspective distortion correct? Ask yourself these questions as you experiment with the projections.
Once you are happy with your projection and the way the image looks, you can now save the image to a folder on your computer.
Rendering
This is the process of saving your panorama.It is called rendering because the software needs to perform the final stitching and edits to your image. On the rendering screen, you will need to take note of the following:
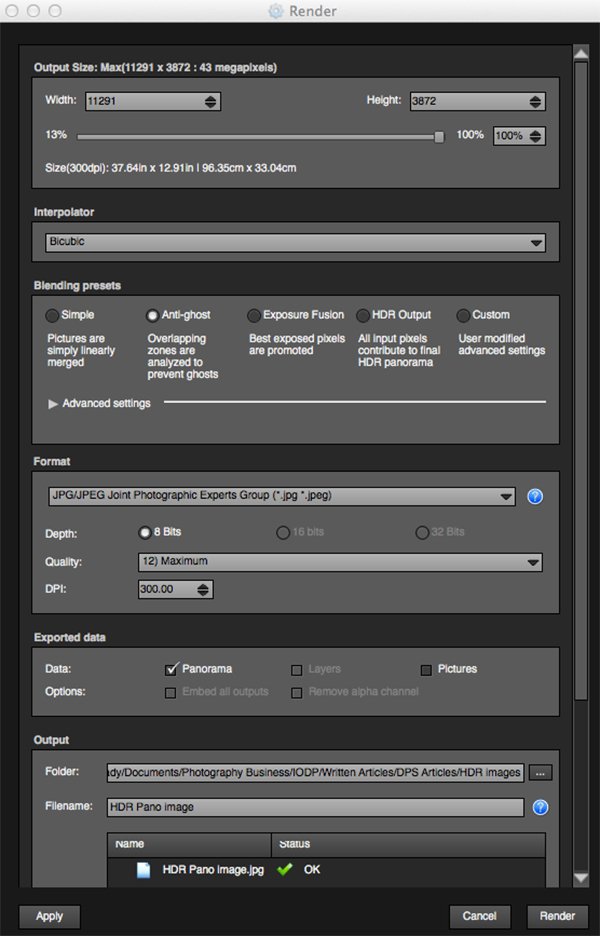
Render and Save screen on Autopano Giga
Interpolator – The interpolator is the method used to assemble the pixels of your panoramic image, and will determine the quality and sharpness of your image. There are a few different options here, but the most commonly used option is Bicubic. The others are useful for advanced stitching.
Blending settings – The purpose of the blending settings is to allow combining of the overlapped sections of your panoramic to look smooth and seamless. You will notice the following presets:
- Simple – This is fast, but it is possible that defects may be seen where the areas overlap.
- Anti-ghost – Conserve the image’s strong characteristics (stops, lines, curves) when mixing while automatically removing objects that have moved
- Exposure fusion – To be used if the panorama was created with a set of bracketed shoots. Keeps the best of different exposures.
- HDR output – To be used by users who wish to create a “.hdr†format file in order to create post-production or special effects. Don’t use this on these images if they have already been processed as HDR images.
- Custom – This is enabled when you manually change the parameters and they no longer correspond to a profile.
On the advanced settings, I generally leave that on the default.
Some of the features that I appreciate in Autopano Giga are as follows:
Exposure and colour blending – The software works hard at sorting out colour and exposure in the blended images. In the past, one of the worst problems with photo stitching was that sometimes the colour or exposure drifted and there was banding in the scene where the light or colour changed. This is a non-issue in Autopano Giga.
Panoramic detection – Sometimes I have shot more than a few panoramic images. When I get back to my computer, I can’t always see or remember which images were which. No problem, you can simply point Autopano Giga to a folder and it will detect all panoramics in that folder.
You can shoot freehand – The software has some really good functionality built-in that can work out multiple viewpoints. So, if you shoot a panoramic without using a tripod or a pano head, the software will be able to detect the scene and make adjustments for it, within reason. Nice to have though, I have shot many handheld panoramic and then dropped them into Autopano and they stitched quite easily.
Format
This section allows you to determine the format in which you want your image to be saved. The two formats I use most are TIFF and JPEG. TIFF is an uncompressed file (which means all the information is still in the file, this is great if you are planning to print the image large) The downside to TIFF is that the files are big. JPEG is a compressed format, that means that some image information has been discarded, the quality will still look the same to the naked eye, but if you print a JPEG image up really big, you may notice some image degradation. Depending on your final output and your space constraints you can choose the format that works best for you. Take the quality up to 12 and set the DPI to 300. This will ensure that you have the best quality image saved.
Output
On this screen, the software needs to know where to save your panoramic and what you want to call it. Choose your destination folder and name the file. Once this is done (it sounds more complicated than it is) click on the render button and the software will begin rendering your image. Depending on the size of the files being stitched, this rendering process can take a few minutes. Once complete, a screen will pop-up to let you know that the image is now rendered.
Edit the final image in Lightroom or Photoshop
Your image is now stitched together, but the final step in the process is to edit the image in your choice of editor. You may want to correct any perspective distortion in Photoshop using the transform tools. If your panoramic image is of a cityscape you will want to make sure that your horizon line is straight and that the buildings are vertical in relation to the horizon. From there you can follow your normal image editing workflow. Once you are done, you will have a fantastic, high resolution, panoramic image.
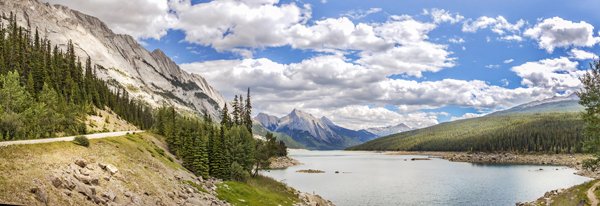
Final edited panoramic image of Medicine Lake in the Canadian Rockies
My comments on Autopano Giga
Autopano giga has made my editing and processing time much quicker and easier. I do a fair amount of panoramic photography, and the time saving when using this software is significant. I have used it to photograph landscape scenes, hotel rooms, building exteriors and architectural photography. It works exceptionally well in all of those areas. If you make sure that you overlap the images enough, it will stitch your images with ease.
The editing process in Autopano Giga is also very easy to use. Simply click on the projections to see how your image looks, make a choice, and you are done. You can make some technical adjustments within the editing area, but I recommend only doing that if it is absolutely essential.
The perspective control of Autopano Giga is fantastic. For the most part, the final stitched images look correct and I almost never pick up an error on the stitch. It is always a good idea to zoom in to the image to make sure that there are no issues like duplicated areas or bad stitches. This is not normally a problem if your overlap is good.
Autopano Giga is a great tool and if you enjoy shooting panoramic images, download a trial and see how it works for you. Panoramic photography is a lot of fun, I am always excited when I see the final stitched image, very often it is not what I was expecting and thats part of the excitement of these types of images. Having a tool that takes the frustration out of the process is a great advantage. So, go out there and experiment.


Source Article from http://feedproxy.google.com/~r/DigitalPhotographySchool/~3/oRyUfWxKeAY/
 Started out doing photography at the age of 6 using an uncle's old 1940 kodak brownie box camera. At 15 years of age, I decided to buy my very own 1975 Praktica SLR camera. I now shoot with a Nikon D850. I do unpaid TFP and commercial paid work.